Tagged:  bread

Home » Posts tagged "bread"

Day of the Dead Bread (Mexico)

In Breads, Crêpes, Pancakes & Puddings, Holidays On October 16, 2016 0 Comments

Every year in central and southern Mexico, the Day of the Dead is traditionally celebrated on November 1 and 2. Although this holiday coincides with the Roman Catholic Church’s All Souls Day and All Saints Day, indigenous cultures have fused the Church’s celebration with the ancient custom of honoring their departed ones.

Memorial altars are erected with photographs of the dead and what used to be their favorite foods. Local bakeries sell Pan de Muertos or Day of the Dead Bread. This sweet bread is made with eggs, anise seeds, flour, sugar and yeast. The loaf is usually round, adorned with dough that is shaped to resemble bones. Although the ingredients are basic, the flavors and texture of this bread literally melt in your mouth!

Ingredients for Bread:
3/4 cup milk (low fat or whole milk)
1/4 cup water
1 package active-dry yeast (Fleischmann’s Rapid Rise Instant Yeast®
2 large eggs
1/4 cup butter, room temperature
1/4 cup plus 2 tablespoons granulated sugar
1 teaspoon vanilla extract
1/2 teaspoon salt
1-1/2 tablespoons anise seeds
3 to 3-1/2 cups all-purpose, unbleached flour.

Ingredients for Glaze:
3 tablespoons freshly-squeezed orange juice
1/2 cup granulated sugar

Prepare the Yeast:
1. In a small saucepot, combine the milk and water; heat until mixture is lukewarm.

2. Place the yeast and lukewarm liquid in a metal bowl or a small, separate metal saucepot; cover and set aside (on a wood or plastic surface) for 13 minutes.

Mix the Dough:
1. After 13 minutes, the yeast mixture will look puffy – transfer it to a 2-quart mixing bowl or a stand mixer fitted with a bowl.

2. Stir in the eggs, butter, sugar, vanilla, salt and anise seeds. Beat on low until mixture is barely uniform.

3. With electric beaters on low, stir in 1 cup flour at a time, until a sticky dough has formed.

4. At this point, clean off the beaters. Using a wooden spoon, add 1/4 to 1/2 cup flour until the dough amalgamates and becomes a little firmer (not hard).

5. Flour your hands and the dough (lightly).

6. Transfer dough onto a lightly-floured board. Knead dough until it is smooth and elastic.

Set Dough to Rise:
1. Oil a clean, 1-1/2 to 2-cup mixing bowl with vegetable oil.

2. Transfer dough to the oiled bowl; cover with aluminum foil and set dough to rise on a wood surface or in a cold oven with door closed. Let dough rise for 20 minutes.

3. After 20 minutes, transfer dough to a lightly-floured surface and punch it down.

4. Remove a 5-inch piece of dough from the dough ball.

5. Shape the largest dough ball into a flat round form and place it on a parchment-lined baking sheet measuring 16 inches by 11 inches.

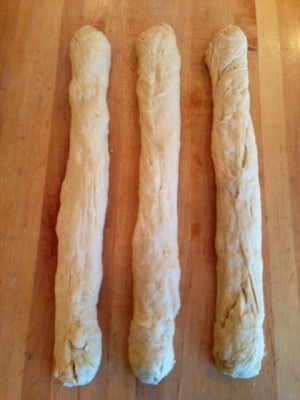
6. Take the smaller dough ball and pull off 4 to 5 walnut-sized pieces. Roll each piece out to about 4 to 5 inches.

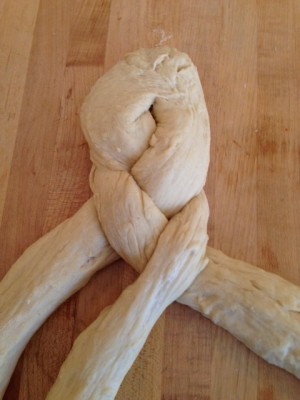
7. Place one rolled dough piece going from the top center and down the sides of dough round on parchment-lined baking sheet.

8. Add the remaining rolled dough pieces in a similar way and evenly spaced all around the dough round.

9. Shape a round knob on top center of the dough round. The rolled dough pieces will look like long bones on the bread.

10. Set dough to rise for 30 minutes on a wood surface or cold oven with door closed.

Bake the Bread:
1. After 30 minutes, transfer the baking sheet with dough to a wood surface; set aside while preheating oven.

2. Preheat oven to 375°F.

3. When oven is preheated, place the baking sheet with risen dough on a rack positioned in center of oven.

4. Bake the bread for 10 minutes.

5. After 10 minutes, lower oven temperature to 350°F; bake the bread for an additional 10 to 15 minutes or until it looks golden brown. To test doneness: insert a pointed knife in center of bread. If knife comes out clean, the bread is done. If not, bake for an additional 5 minutes and test once more.

6. Transfer baking sheet with bread to a counter to cool.

Make the Glaze:
1. When bread is completely cool, place 1/4 cup sugar and the orange juice in a small saucepot and heat until the sugar melts.

2. Let the orange juice-sugar glaze cool completely.

3. Using a basting brush, glaze the bread. Sprinkle the bread with remaining sugar.

image-jaguarforest4bags

Enjoy Day of the Dead Bread with the best Mexican coffee on the market -Jaguar Forest® Organic Coffee, sold at Erewhon supermarkets in Los Angeles, Venice and Calbasas, California; and also at Vicente Foods, Los Angeles; Rainbow Acres, Culver City and Marina del Rey, California.

Jaguar Forest® Organic Coffee can also be found online: http://jaguarforest.com

Text and Day of the Dead Photograph ©2016 Nancy DeLucia Real
Jaguar Forest® Coffee Photograph ©2016 Jaguar Forest® Coffee Company

Flaxseed Bread with Honey & Sesame Seeds

In Breads, Crêpes, Pancakes & Puddings On October 9, 2015 0 Comments

This bread gets its sweet, nutty texture from the honey, sesame seeds and flaxseed meal. If you guessed that it’s healthy, you’re right. Since you make your own bread, you know exactly what wholesome ingredients you put into it. Enjoy this bread with any meal. Alternatively, slice the bread, toast it and serve it with butter and preserves at breakfast.

Active prep time: 30 minutes (mixing and assembling dough)
Inactive prep time: 50 to 60 minutes (two dough risings)
Bake time: 25 to 30 minutes
Makes: 2 loaves

Ingredients:
1 tablespoon or 1 packet Rapid Rise Yeast® dissolved in 3/4 cup warm water and set aside to rise for 10 minutes
5 cups organic, unbleached, all-purpose, white flour
¾ cup flaxseed meal
1 teaspoon salt
¼ cup olive oil
¼ cup honey
¼ cup toasted sesame seeds
1 cup warm water
2 teaspoons untoasted sesame seeds

Directions:

1. Combine 4 cups of the flour with the flaxseed meal and salt in a large, shallow bowl, forming a well in the center.

2. Pour in the risen yeast and water mixture, olive oil, honey, sesame seeds and the water.

3. Using a fork, mix wet ingredients until combined.

4. With a fork, gently begin mixing in flour from the sides of the well, a little at a time.

5. Each time you mix in some flour, make sure to blend it well into the wet ingredients.

6. Keep incorporating flour from the sides of well in small amounts, until you have formed a soft dough.

7. If dough is too wet and sticky, add flour in small amounts until the dough is uniform and you can grab it. It should be soft and smooth.

8. With lightly floured hands, gently knead the dough inside the bowl, adding small amounts of flour, until it is smooth and elastic.

9. Set dough aside on floured surface while you oil the bowl. Return dough to the oiled bowl and cover it with aluminum foil or a clean kitchen towel. Set the dough aside for 30 minutes to rise.

10. After 30 minutes, punch down the dough in center.

11. Lift dough out of bowl and, with an oiled knife, cut it into two equal pieces.

12. Shape each piece into an oval loaf.

13. Place loaves, crosswise and spaced apart by 4 inches, on an oiled 18 x 12-inch baking sheet.

14. Sprinkle each loaf with 1 teaspoon untoasted sesame seeds.

15. Cover the dough with an oiled sheet of aluminum foil and let it rise for an additional 20 to 30 minutes.

Bake the Bread Loaves:
1. After 20 to 30 minutes, preheat oven to 400°F.

2. When oven is preheated, place the baking sheet with bread dough on rack and bake for 25 to 30 minutes.

4. After baking for 25 minutes, test the doneness of bread loaves by lifting the bottom with a spatula. If bottoms are golden brown, the loaves are done. If not, bake for 5 more minutes.

5. Serve bread warm. Alternatively, this bread can be stored in plastic food bags in refrigerator for up to two weeks. It can be sliced and toasted.

6. Optional: When bread has cooled completely, one or two loaves may be frozen up to one month in double freezer plastic bags.

7. To Thaw Frozen Bread: Remove bread from freezer bags; set on a wood board or cutting board to thaw at room temperature for 3 hours.
Text and Photograph ©2015 Nancy DeLucia Real

Oat-Spelt Bread

In Breads, Crêpes, Pancakes & Puddings On July 28, 2015 0 Comments

Ever wonder where our rustic breads made with oat and spelt flour originated? The ancient Greeks and Romans made a variety of breads with white and dark flours. However, ancient Gaul (modern-day France) is the rock star for delicious recipes made with grains. Spelt was high on their foods’ list. Here’s a recipe for oat-spelt bread from my July 23 & 24 historic culinary course, Feasts & Opulence in Roman Gaul, at the Getty Villa, Los Angeles. Check out my KCET interview for this course here-

http://www.kcet.org/living/food/the-public-kitchen/recipe-homemade-cheese-ancient-rome.html

Due to organic spelt and oat flours, this bread is not only healthy but also light in texture. Once you taste this grainy, honey-sweetened bread, you won’t want the ready-made stuff anymore.

Active prep time: 30 minutes (mixing and assembling dough)
Inactive prep time: 60 minutes (two 30-minute dough risings)
Bake time: 25 to 30 minutes

Ingredients:
1 tablespoon (1 envelope) Rapid Rise Yeast®, dissolved in 3/4 cup warm water and set aside to rise for 10 minutes
1 cup organic oat flour
2 cups organic sprouted spelt flour
1-1/2 to 2 cups organic, all-purpose, unbleached white flour 1-1/2 teaspoons salt
1-1/2 to 2 cups warm water
3 tablespoons honey
1/4 cup olive oil
1/4 cup raw oatmeal (for garnish)

Directions for Preparing the Dough:

1. Combine the oat, spelt and all-purpose flour in a large, shallow mixing bowl.

2. Stir in the salt

3. Make a well in center of dry ingredients.

4. Pour in the risen yeast-water mixture, 1 more cup of water, honey and olive oil into the well.

5. Using a fork, mix the wet ingredients until combined.

6. Gently mix in, a little at a time, flour from the inner sides of the well.

7. Each time you mix in some flour, make sure to blend it well into the wet ingredients.

8. Gather flour from sides of well in small amounts until a soft dough has formed. If dough is too
dry, add water in 1/4 cup increments until it amalgamates and becomes soft.

9. If dough is too wet and sticky, add flour in small amounts until the dough is uniform and you
can gather it. The dough should be soft and smooth.

10. With lightly-floured hands, gently knead the dough inside bowl, adding small amounts of
flour, until it is smooth and elastic.

11. Set dough aside on a floured surface while you oil the bowl.

12. Return dough to the oiled bowl and cover it with aluminum foil or a clean kitchen towel.

13. Set the dough aside for 30 minutes to rise.

Directions for Shaping & Baking the Bread:

1. After 30 minutes, punch down the dough in center.

2. Lift dough out of bowl and place dough on a parchment-lined 18 X 12-inch baking sheet.

3. Gently flatten and stretch out the dough to a 10-inch circle.

4. Cover the dough again and let it rise for an additional 20 to 30 minutes.

5. After 20 to 30 minutes, preheat oven to 400°F.

6. Meanwhile, oil a sharp knife and score the dough into eight wedges.

7. Sprinkle the bread dough with the raw oatmeal.

8. When oven is preheated, place baking sheet with bread dough on rack positioned in center of oven.

9. Bake the bread for 25 minutes (ovens vary in baking time).

10. After 25 minutes, test doneness of bread by lifting the bottom with a spatula. It should look golden brown. If bottom of bread is not golden brown, bake it for 5 more minutes.
Text and Photograph ©2015 Nancy DeLucia Real

Italian Easter Bread

In Breads, Crêpes, Pancakes & Puddings, Holidays On April 4, 2014 0 Comments

Symbolizing fertility, eggs are featured in the traditional foods of many cultures during Springtime.

In Italian gastronomy, colorful eggs are used to decorate baked delicacies at Easter. They are reminiscent of rebirth and the resurrection of Jesus Christ.

Celebrate Spring or Easter by making this festive bread known as pane di Pasqua. – Italian, for Easter Bread!

Active Prep Time: 45 minutes (for making dough & coloring eggs)
Inactive Prep Time: 90 minutes (for two dough risings of 45 minutes each)
Bake Time: 30 to 35 minutes

Prepare the Yeast Starter:
1/2 cup water
1 envelope (7 grams or 1/4-ounce) active dry yeast
1/2 teaspoon granulated sugar

1. In a 1-pint metal bowl, combine the dry yeast and the sugar; set aside.

2. In a 1-pint sauce pot, heat the water until it is warm, but not hot.

3. Pour the warm water over the yeast-sugar mixture.

4. Swirl the bowl slightly to mix the dry and wet ingredients gently.

5. Cover the bowl and place it on a wood board for 15 minutes.

6. Meanwhile, assemble the dough ingredients as follows:

Prepare the Dough:
1/2 cup water
1/2 cup milk
1 large egg
3/4 cup granulated sugar
1/4 cup vegetable oil
1 teaspoon vanilla extract
3 tablespoons rum (light or dark)
1/4 teaspoon ground cinnamon
1/2 teaspoon salt
3-1/2 to 3-3/4 cups all-purpose, unbleached organic flour

1. Heat the water and milk together in a 1-quart sauce pot until the liquid is barely lukewarm; set aside.

2. After the yeast mixture has risen for 15 minutes, it will look puffy. Transfer it to a 6 to 8-quart mixing bowl or a stand mixer.

3. Whether using a hand mixer or the stand mixer, on low speed, stir in the water-milk liquid, egg, sugar, oil, vanilla, rum, cinnamon and salt.

4. When the mixture is smooth, gradually stir in the flour, 1 cup at a time.

5. Each time you add 1 cup of the flour, make sure the batter that forms is smooth and uniform.

6. After adding about 3 cups of the flour, a dough should form. It will be thick and sticky.

7. At this point, use a wooden spoon to mix in an additional 1/2 to 3/4 cup flour.

8. The dough should amalgamate and become semi firm, but soft and easy to handle.

9. Transfer the dough to a smooth, lightly floured wood board and knead it lightly until dough is uniform. [When kneading, to prevent dough from sticking to the board, lightly add flour to top of dough and wood surface.]

NOTE: Do not place the dough on marble, granite or tile, as these surfaces are too cold and will halt the rising process of the dough.

10. When the dough is smooth, set it aside.

11. Oil an 8-quart bowl; transfer the dough to the oiled bowl.

12. Cover the bowl with a clean kitchen towel; set bowl away from draft and let dough rise for 45 minutes.

13. After 45 minutes, punch down the dough and, with a knife, divide it into 3 equal pieces.

14. Shape each of the 3 dough pieces into a ball; set them aside.

15. Take one dough ball and place it on a lightly-floured wood board. Gently begin rolling the dough ball, stretching it to out, to the sides.

16. As you roll the dough ball, it will elongate.

17. Continue the rolling and stretching process until you have made a strand of dough measuring 23 to 24 inches in length. Set the dough strand aside.

18. Repeat the above rolling and stretching technique for the remaining two dough balls. You should now have three strands of dough.

19. Place the three strands of dough next to each other, to form three rows (they will be parallel to each other):

Dough3Tubes

20. At one end of the dough strands, press them into each other so that they hold together. Begin forming a braid:

DoughBeginBraid

21. After completing the braid, shape it into a wreath. Press edges together to close the wreath (it will be a circle). Set the dough wreath aside:

EasterBread.RawWreath

22. Meanwhile, line an 18-inch X 12-inch baking sheet with parchment paper.

23. Gently lift and quickly transfer the wreath onto the parchment-lined baking sheet.

24. Cover the wreath with a clean kitchen towel; set baking sheet with wreath aside on a wood surface or in a cold oven to rise for 45 minutes.

25. After 45 minutes, preheat the oven to 375°F. In the meantime:

Prepare Egg Wash & Decoration:
3 colored Easter eggs (made a day ahead, per instructions on one Easter egg coloring kit)
1 egg yolk, mixed with 1 teaspoon cold water (this is the egg wash)
Nonpareils candies

1. Place the colored eggs, spaced evenly, over wreath; gently push them into dough until they are snug.

2. Brush top of wreath with egg wash (DO NOT BRUSH THE COLORED EGGS).

3. Sprinkle the wreath with nonpareils candies:

EasterBreadRisenWatermrk

Bake the Bread:
1. Place the baking sheet with wreath on a rack positioned in center of preheated oven.

2. Bake the bread for 30 minutes. After 30 minutes, insert a pointed knife in the bread. It should come out clean. If not, bake the bread for 5 more minutes.

3. After 30 to 35 minutes of baking, transfer the baking sheet with bread to a counter to cool (at this point, marble granite or tile counters can be used).

4. Serve the Easter bread warm or at room temperature, but cutting it into 2-inch thick slices.

TO STORE: After the bread has cooled completely, cut it into 4 sections. Wrap each section in plastic wrap and place it in double freezer bags. Freeze the sectioned bread for up to one month.

TO THAW: Remove bread section(s) from freezer bags and unwrap. Place the bread section on a plate, covered with a new sheet of plastic wrap, to thaw for 1 to 2 hours. Slice the bread and serve.

Text & Photographs © Nancy DeLucia Real

Easy Pita Breads

In Breads, Crêpes, Pancakes & Puddings, Fun Foods On December 6, 2013 0 Comments

Pita is a slightly leavened bread, flat, round or oval and varied in size. The term pita derives from the Ancient Greek pēktos, meaning “solid” or “clotted”.

For centuries, citizens of Mediterranean and Middle Eastern countries, including Turkey, Israel, Syria and Egypt have made pita bread using a recipe similar to this one. Make these fresh and easy pitas early in the morning – they’re delicious with jam and butter.

Prep time: 30 minutes
Inactive prep time: 20 minutes (dough rising & baking)
Makes: Twelve 8-inch pita breads

Ingredients:
1 envelope Rapid Rise yeast
1 teaspoon granulated sugar
1 to 1½ cups warm water
4 to 4½ cups unbleached, organic white flour
1 tablespoon salt
vegetable or olive oil (to oil a bowl)

Prepare the dough:

1. In a small saucepot, combine the yeast, sugar and water.

2. Cover the saucepot and let yeast mixture rise 8 to 10 minutes or until it looks puffy.

3. Meanwhile, in a 4 to 6-quart mixing bowl, combine the flour and the salt.

4. After the yeast mixture has risen, make a well in the flour mixture. Add the liquid yeast mixture to center of well.

5. Begin mixing in the flour from sides of well into the liquid yeast mixture.

6. A dough should start to form – if dough is too dry and does not amalgamate, add an additional 1/2 cup of water.

7. Gently knead the dough inside bowl until it is smooth (2 to 3 minutes). Set dough aside on a plate, wood board or plastic board.

8. Oil the bowl and return dough to the oiled bowl.

9. Cover the dough in bowl with a clean kitchen cloth or aluminum foil.

10. Set bowl with dough on a wood board on a counter (no granite or marble) away from draft. Alternatively, transfer the covered bowl to a cold oven.

11. Let dough rest for 10 minutes.

12. After 10 minutes, knead the dough for 1 to 2 minutes or until it is smooth and elastic.

13. Divide the dough into 12 equal balls.

Rolling out the dough and baking the pita breads:

1. Preheat oven to 425°F.

2. Oil and flour two 12 X 18-inch baking sheets; set aside.

3. On a lightly floured board and using a rolling pin, flatten one dough ball.

4. Roll out the dough ball into an 8-inch circle and place it on a baking sheet.

5. Repeat rolling remaining dough balls, placing them on baking sheets – each sheet should hold 6 dough circles.

6. Bake the pita breads for 3 to 5 minutes.

7. After 3 to 5 minutes when the pitas puff up slightly or look light golden, turn them over and bake for an additional 2 minutes.

8. Check to see that both sides of pita breads look light golden. If not, bake for an additional 1 to 2 minutes.

9. When pita breads are done, transfer the baking sheets to a counter.

10. Serve the pita breads warm, with jam and butter or with salads. Cold pitas can be filled to make quick appetizers or “pocket” sandwiches.

Text and Photograph ©2013 Nancy DeLucia Real