Category:  Breads, Crêpes, Pancakes & Puddings

Home » Archive by category "Breads, Crêpes, Pancakes & Puddings" (Page 3)

Easy Pita Breads

In Breads, Crêpes, Pancakes & Puddings, Fun Foods On December 6, 2013 0 Comments

Pita is a slightly leavened bread, flat, round or oval and varied in size. The term pita derives from the Ancient Greek pēktos, meaning “solid” or “clotted”.

For centuries, citizens of Mediterranean and Middle Eastern countries, including Turkey, Israel, Syria and Egypt have made pita bread using a recipe similar to this one. Make these fresh and easy pitas early in the morning – they’re delicious with jam and butter.

Prep time: 30 minutes
Inactive prep time: 20 minutes (dough rising & baking)
Makes: Twelve 8-inch pita breads

Ingredients:
1 envelope Rapid Rise yeast
1 teaspoon granulated sugar
1 to 1½ cups warm water
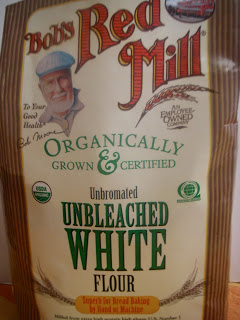
4 to 4½ cups unbleached, organic white flour
1 tablespoon salt
vegetable or olive oil (to oil a bowl)

Prepare the dough:

1. In a small saucepot, combine the yeast, sugar and water.

2. Cover the saucepot and let yeast mixture rise 8 to 10 minutes or until it looks puffy.

3. Meanwhile, in a 4 to 6-quart mixing bowl, combine the flour and the salt.

4. After the yeast mixture has risen, make a well in the flour mixture. Add the liquid yeast mixture to center of well.

5. Begin mixing in the flour from sides of well into the liquid yeast mixture.

6. A dough should start to form – if dough is too dry and does not amalgamate, add an additional 1/2 cup of water.

7. Gently knead the dough inside bowl until it is smooth (2 to 3 minutes). Set dough aside on a plate, wood board or plastic board.

8. Oil the bowl and return dough to the oiled bowl.

9. Cover the dough in bowl with a clean kitchen cloth or aluminum foil.

10. Set bowl with dough on a wood board on a counter (no granite or marble) away from draft. Alternatively, transfer the covered bowl to a cold oven.

11. Let dough rest for 10 minutes.

12. After 10 minutes, knead the dough for 1 to 2 minutes or until it is smooth and elastic.

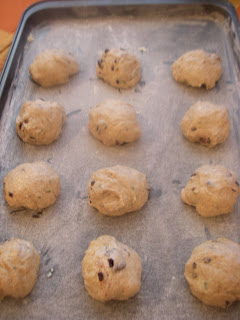
13. Divide the dough into 12 equal balls.

Rolling out the dough and baking the pita breads:

1. Preheat oven to 425°F.

2. Oil and flour two 12 X 18-inch baking sheets; set aside.

3. On a lightly floured board and using a rolling pin, flatten one dough ball.

4. Roll out the dough ball into an 8-inch circle and place it on a baking sheet.

5. Repeat rolling remaining dough balls, placing them on baking sheets – each sheet should hold 6 dough circles.

6. Bake the pita breads for 3 to 5 minutes.

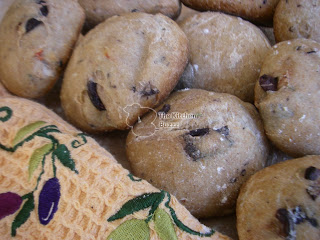
7. After 3 to 5 minutes when the pitas puff up slightly or look light golden, turn them over and bake for an additional 2 minutes.

8. Check to see that both sides of pita breads look light golden. If not, bake for an additional 1 to 2 minutes.

9. When pita breads are done, transfer the baking sheets to a counter.

10. Serve the pita breads warm, with jam and butter or with salads. Cold pitas can be filled to make quick appetizers or “pocket” sandwiches.

Text and Photograph ©2013 Nancy DeLucia Real

Pumpkin-Walnut Pancakes

In Breads, Crêpes, Pancakes & Puddings, Holidays On November 26, 2013 0 Comments

For me, the most comforting part of a holiday is when I start my day with a great cup of coffee and a delicious breakfast. This Thursday (Thanksgiving Day), have your family wake up to these luscious pumpkin-walnut pancakes. Add some pure maple syrup and enjoy the moment. Happy Turkey Day!

Prep time: 10 minutes
Cook time: 10 minutes
Makes: Six to eight 5-inch pancakes

Ingredients:
1 large egg
1 cup plus 2 tablespoons milk
2 tablespoons vegetable oil
1 teaspoon vanilla extract
1/4 cup canned pumpkin
3 tablespoons chopped walnuts
1 tablespoon granulated sugar
1 tablespoon brown sugar
1 cup plus 1 tablespoon unbleached, all-purpose flour
1 teaspoon baking powder
1/2 teaspoon salt
1/4 teaspoon ground cinnamon
Dash ground nutmeg
100% pure maple syrup (any brand)

1. In a 2 or 3-quart mixing bowl, combine the egg, milk, oil, vanilla extract, pumpkin, walnuts and the sugars.

2. Using a wire whisk or a fork, mix until ingredients are uniform.

3. Stir in the remaining ingredients – do not overmix.

4. On medium-high setting, heat a non-stick skillet (or a pancake griddle).

5. Once the skillet or griddle is heated, lower the setting.

6. Butter the skillet or griddle.

7. Immediately add 1/4-cup of the pancake batter onto the skillet or griddle, letting it spread to a 5-inch circle.

8. Continue forming 5-inch pancakes, leaving a one-inch space in between each one.

9. Cook the pancakes for about 2 minutes per side or until underside is light golden brown when lifted with a spatula.

10. Immediately serve the hot pancakes with pure maple syrup.

Note: Dollar-size pancakes are shown in photograph.

Text and Photograph ©2013 Nancy DeLucia Real

Organic Olive-Rosemary Rolls made with Bob’s Red Mill® Organic, Unbromated Flour

In Breads, Crêpes, Pancakes & Puddings On January 24, 2013 0 Comments

Bob'sRedMillOrganicFlour
Advertise Your Product Here – contact thekitchenbuzzz@gmail.com

Active Prep time: 50 to 55 minutes
Inactive Prep time (rising of dough): 1 hour and 15 minutes
Bake time: 15 to 20 minutes

In the past months, I’ve avoided soy and corn flours which are “snuck” into many baked products we buy (read the labels carefully). Soy and corn are GMO’s or “genetically modified organisms”. In simple terms, soy, corn and other gmo’s are modified or “altered” at the gene level.

In an effort to say healthy, I’ve switched to Bob’s Red Mill® Organic, Unbromated flour products exclusively.

Why not try your hand at baking organic olive-rosemary rolls. Worried about rising and bake times? Do your laundry or get your other work done while waiting. The aroma of freshly baked bread will warm your heart and soul. And, you’ll never buy that ready-made brand again.

Ingredients:
1 envelope yeast
1 teaspoon granulated sugar
2 cups warm water
One 10 to 15-ounce jar or can of organic Kalamata olives (drained, pitted and coarsely chopped)
One 5-inch sprig fresh, organic rosemary (leaves removed and stem discarded)
1 large clove garlic, peeled
1-1/2 teaspoons sea salt
1 jalapeno pepper (optional), stem cut and discarded
1 large organic egg
4 tablespoons extra virgin olive oil
3-1/2 cups Bob’s Red Mill® unbleached, organic and unbromated, all-purpose flour
1-1/2 cups Bob’s Red Mill® organic, whole wheat flour

1. In a 1-quart saucepot, combine the yeast and sugar; set aside.

2. In a separate 1-quart sauce pot, warm up the water. It should be slightly warmer than lukewarm. Pour 1 cup of the water over the yeast and sugar mixture. Cover and set aside on a warm surface such as a wood board (no granite, marble or stone*). Let the yeast mixture rise for 15 minutes.

3. Meanwhile, in a food processor, grind together the rosemary leaves, garlic, sea salt and jalapeno pepper; set aside.

4. After the yeast mixture has risen for 15 minutes and looks puffed up, transfer it to a 6 to 8-quart glass or porcelain mixing bowl. Alternatively, transfer the mixture to the bowl of a stand mixer.

5. On low mixing speed, stir in the rosemary-garlic mixture and the chopped Kalamata olives. Add the egg, olive oil and 1/2 cup warm water. Blend on low speed for 30 seconds; set aside.

6. In a separate 2-quart bowl, combine 2-1/2 cups all-purpose flour with 1-1/2 cups wheat flour (reserve the remaining 1 cup all-purpose flour for when you will knead the dough).

7. Gradually stir the combined flours into the bowl with wet ingredients until a sticky dough forms. Mix on low for about 1 minute or until the dough looks uniform.

7. Turn out dough onto a floured board. With floured hands, gently knead the dough, letting it absorb a little flour at a time. This is what it will look like:

DoughtoOiledBowl

8. When dough is soft but no longer sticks to your hands, transfer it to a large, oiled bowl. Cover the dough in bowl with a clean cloth.

9. Set the bowl on a wood board (no granite, marble or stone), away from draft, to rise for 45 minutes.

10. After 45 minutes, punch down the dough in its center. Turn the dough out onto lightly-floured board.

11. With floured hands and using a knife, cut off dough in pieces measuring 2-inches. Shape the dough pieces into 24 to 30 balls.

12. Divide the dough balls among two greased and floured 12 X 18-inch baking sheets. Set the dough balls 2 inches apart on the baking sheets:

RollsinBakingSheets

13. Cover the baking sheets containing the dough balls with a clean cloth; set aside to rise on a wood board, away from draft for 30 minutes.

14. Preheat oven to 475°F. Place baking sheets in oven. Immedialy lower oven temperature to 450°F. Bake the rolls for 8 minutes.

15. After 8 minutes, invert the baking sheets (put the upper sheet on lower rack and vice-versa).

16. After 7 more minutes, insert a pointed knife in center of one bread roll. If knife comes out clean, the rolls are done. TOTAL BAKING TIME WILL BE ABOUT 15 MINUTES.

Et voila – presenting Organic Olive-Rosemary Rolls!

OliveBreadsWatermark1.16.13

Serve rolls warm.

TO FREEZE ROLLS: Let the rolls cool completely. Store in double Ziploc® bags and freeze up to 1 month.

TO THAW ROLLS: Take rolls out of Ziploc® bags and set them on a baking sheet on kitchen counter to thaw for 30 minutes. Warm up for 10 minutes in a preheated 350°F oven.

*Note: Setting yeast mixture or yeast bread on a “cold” surface will halt the “rising” process.

Text and All Photographs ©2013 Nancy DeLucia Real

Vanilla Oat Scones

In Breads, Crêpes, Pancakes & Puddings On December 2, 2011 2 Comments

I love oatmeal in any way, shape or form and also for breakfast, lunch or dinner. Imagine the glee I must have felt when I discovered that oatmeal could be a main ingredient in homemade scones.

I make this recipe with either butter or vegetable oil (gotta be honest – scones are more delish when made with butter!). The warm, vanilla aroma of my oat scones is very comforting. Warning – warm scones will not only melt in your mouth, but they’ll make you reach for that extra pat of butter. Be sure to add a chaser of jam or jelly to every morsel.

Prep time: 15 minutes
Bake time: 12 to 14 minutes
Makes: 8 to 10 scones

Ingredients:
1½ cups all-purpose unbleached flour
1½ cups oats, uncooked (old-fashioned or quick-cooking)
1 tablespoon baking powder
½ teaspoon salt
1/3 cup granulated, unbleached sugar
½ cup currants, raisins or chocolate chips
1 large egg
1/3 cup milk (whole or low-fat)
2/3 cup unsalted butter, melted (2/3 cup vegetable oil can be substituted for the butter)
½ teaspoon vanilla extract

1. Preheat oven to 425˚F. Line a 12X18-inch baking sheet with parchment paper. Alternatively, you can grease and flour the baking sheet.

2. In a 2-quart mixing bowl, stir the flour, oats, baking powder, salt, sugar with the currants, raisins or chocolate chips; set aside.

3. In a small bowl, and using a fork, mix together the egg, milk, butter or oil and the vanilla.

4. Stir the liquid ingredients into the bowl with the dry ingredients; mix until dough is uniform (do not overmix).

5. With floured hands, gather the dough into a ball. Transfer dough ball to a flat, floured surface and, with a rolling pin, roll it out to a 7 or 8-inch circle. The dough should be about ½-inch thick.

6. Using a 2-inch round cookie cutter, cut into the dough, making concentric circles. Pick up any excess dough and reshape it into a ball, flatten it and cut an extra circle or two (there will be a total of 8 to 10 cut circles).

7. Place dough circles on baking sheet, leaving a 1 to 2-inch space between each one.

8. Place baking sheet on a rack positioned in center of oven.

9. Bake 12 minutes. After 12 minutes, check bottom of one scone by lifting it with a spatula. If underside is golden brown, the scones are done. If not, bake an additional 2 minutes.

Serve warm with butter and fruit preserves.

Text & Photograph ©2011 Nancy DeLucia Real

Tortilla & Nutella

In Breads, Crêpes, Pancakes & Puddings, Fun Foods On April 2, 2011 3 Comments

One of the best things in every culture is the food, right? I’ll start with my own – we Italians can’t live without Nutella®, a chocolate-hazelnut spread that is served with bread and caffè latte at breakfast time. In Mexico (also in Mexican restaurants in California and yonder), warm, flour tortillas are used as bread alongside breakfast, lunch or dinner. Filled with savory ingredients, tortillas can turn into a satisfying pick-me-upper whenever one has the munchies.

Years ago, I gave tortillas and Nutella® a green card (or permanent residence) in my kitchen. Now, can you guess what happened one day when I was craving a chocolate-filled crêpe, but only found tortillas and Nutella®? You got it.

Get ready to enter chocolate bliss the moment you taste this anytime-treat.

Prep time: 3 to 4 minutes
Serves: 3 to 4 minutes

Ingredients:
Two 8-inch* flour tortillas
4 heaping tablespoons Nutella®

1. In a 12-inch nonstick skillet set on medium heat, warm the tortillas through (turn them over once in a while to prevent blackening) – about 2 minutes.

2. Transfer the tortillas to a flat surface such as a dinner plate or a cutting board.

3. While still warm, quickly drop 2 heaping tablespoons of Nutella® on one-half of each tortilla and fold the plain tortilla half over the Nutella®.

Serve immediately.

*Note: Larger flour tortillas can be substituted – just be sure to double the Nutella®!

Text and Photograph ©2011 Nancy DeLucia Real