Tagged:  dessert

Home » Posts tagged "dessert"

Struffoli – a Neapolitan holiday dessert

In Desserts, Creams & Sauces On December 18, 2015 0 Comments

These sweets are a traditional Christmastime dessert in Naples. They are small balls of fried dough that are dipped in honey and sprinkled with decorative candies. At your holiday table, this struffoli platter will steal the show!

Prep time: 2 hours (this is a fun recipe for 2 or more people to make together)
Serves: 10 to 12

Ingredients:
1 to 2 tablespoons semolina (for flouring)
3 large eggs
1 tablespoon sugar
zest of 1 unwaxed lemon, finely grated
1 tablespoon vegetable oil (for the batter)
1-1/2 to 2 cups flour, plus a little more for rolling
¼ teaspoon baking powder
1 to 1½ quarts vegetable oil, preferably sunflower or safflower (for frying)
1-1/2 cups spun honey (16-ounce container)
2 teaspoons non-pareils candies, for decoration

Mix and Form the Dough:
1. Line a baking sheet with parchment paper; sprinkle the sheet with semolina and set aside.

2. Line another sheet or platter with double paper towels (this will be used to drain the fried struffoli); set aside.

3. In a mixing bowl, beat together the eggs, lemon zest and 1 tablespoon oil until mixture is uniform.

4. Gradually (a little at a time) add about 1-1/2 cups flour and baking powder to form a dough.

5. If dough is too sticky, add about 1 to 2 tablespoons more flour until the dough is formed and pliable. It should be smooth.

6. Take the dough out of the bowl and place it on a lightly-floured surface.

7. You will barely have to knead the dough, coating it with a LIGHT amount of flour until it no longer sticks to your hands.

Shape the Struffoli:
1. Tear off a marble-sized piece of dough and roll it with your hands.

2. Set the ball aside on the lightly-floured parchment sheet on baking dish.

3. Repeat rolling instructions until all the dough has been rolled into marble-sized balls.

Fry the Struffoli:
1.Heat 1 quart oil in a wide, heavy pan or saucepot at 375°F (the oil should be 6 inches deep).

2. Gently lower about 12 dough balls at a time into the hot oil. They will first sink and then, as they cook, they will float up to the surface and begin to turn golden brown.

3. Make sure to roll them around with a slotted spoon so that they do not burn underneath and instead, evenly turn light golden brown. THIS WILL TAKE LESS THAN A MINUTE. NOTE: Struffoli should not blacken.

4. When struffoli are light golden brown, immediately transfer them to the paper towel-lined sheet or platter.

5. Continue frying the struffoli in batches, making sure to control the heat if it is too high or too low.

Coat the Struffoli with Warm Honey:
1. Place a serving platter close to you on a counter; set aside.

2. Transfer the spun honey into a 2 to 4-quart saucepot.

3. Add 1/3 cup cold water to the honey in saucepot and warm up the mixture.

4. When the honey mixture begins to bubble and foam, add a slotted spoonful of struffoli to the honey.

5. Immediately STIR GENTLY ONCE as you lift out the struffoli from the warm honey.
NOTE: MAKE SURE THE HONEY DOES NOT BUBBLE UP AND OUT OF THE SAUCEPOT – CONTROL THE HEAT SETTING ON LOW.

6. Let them drip slightly over the honey pot and quickly transfer them to center of platter.

7. Work quickly to repeat coating the struffoli, lifting and draining them and then transferring struffoli to the platter – SHAPE THE MOUND OF STRUFFOLI INTO A CONE OR PYRAMID.

8. When all struffoli have been set on platter, immediately sprinkle them with the non-pareils candies.

9. Set platter of struffoli aside until ready to serve.

10. If you need to cover struffoli, lightly oil a sheet of plastic wrap and set it over the platter.
Text and Photograph ©2015 Nancy DeLucia Real

Trips & Tips: The Bilbao Adventure (Guggenheim Museum & Batzokia Restaurant)

In Nancy's Articles On June 17, 2014 0 Comments

My recent trip to Spain (from April to May, 2014) lasted one glorious month. Traveling from north to south, every day in Spain proved to be adventurous and educational.

On April 7th, my husband and I began our adventure in the Basque country (Northern Spain). We rented an apartment in San Sebastian and went on day trips from there.

As an art historian, I couldn’t wait to get to the city of Bilbao, home to the Guggenheim Museum which opened in 1997. Architect Frank Gehry designed the structure which is made of titanium, glass and limestone. It was hailed the most important building of its time. Although it was a gray day when we arrived, the museum’s curvilinear exterior was dynamic, as though it were a living, breathing organism.

As we walked around, we were pleasantly surprised by Jeff Koons’ colorful Tulips in Bilbao sculpture. Tulips was created by the artist and permanently installed at the Guggenheim Bilbao in July 2006. Isn’t it delightful? Koons is well-known for his balloon animals, made of stainless steel, with a mirror-like finish. He also designed the cover for Lady Gaga’s third album, ARTPOP, released in 2013.

Image.Koons

Architecture is a work of art (the art of making buildings). As such, it is best viewed from different perspectives. Walking further around the museum, we discovered a sculpture, Maman, created by Louise Bourgeois in 1999. This monumental spider is made of bronze, marble and stainless steel. The artist made this as a tribute to her mother, a weaver. While spiders are predators, they weave cocoons and can thus be seen as maternal symbols.

When standing directly below Maman, you can look up and see the spider’s belly, consisting of a black net containing eggs. I think it’s so cool to look up and see those large white eggs!

Image.SpiderBig

The exhibitions and objects from the permanent collection of the Guggenheim Museum are organized by the Guggenheim Foundation and the Guggenheim Museum Bilbao.

Once you enter the museum, you should first view Richard Serra’s The Matter of Time (see image below). Here’s a tip: take the elevator up to the next floor and get a birds’ eye view of this mind-boggling installation. It is composed of rolled sheets of steel which are curved along the horizontal and vertical axes, as though made of tin. The solid sheets are 2 inches thick, up to 50 feet long and 14 feet high. Due to their excessive weight, the only rolling mill in the world that could handle them was the mill at Siegen, Germany.

Notice the spaces between those sheets. As you walk through the spaces, you are at once inside the art object as well as a part of it. You can talk or shout – listen to your echo.

Image.SerraAerial

As I walked inside these immense steel walls, I found myself disconnecting from the world around me, losing sense of  reality or time. It was so awesome! The photo below was taken as I stood between Serra’s steel units.

Image.SerraNRinfront

As soon as I walked into the galleries and saw this painting, I said, “Mmmm, the bodies are missing. I wonder who made this?” The artist is José Manuel Bellester, from Madrid. His masterpiece is called Raft of the Medusa, a photographic print on canvas, 2010.  

Bellester looks at the works of past masters. He then removes the characters but keeps the background. These magnificent pieces are a result of combining digital photography and painting. While contemplating  this object, you could almost imagine yourself stepping onto the raft.

Image.BellesterRaft

Here’s the image that inspired Bellester –  Raft of the Medusa, an oil painting by Théodore Géricault, made 1818-1819, The Louvre.

Image.Raft.Geric1818-1819

Next up, we saw The Body That Carries Me, by Ernesto Nieto, a native of Rio de Janeiro, Brazil. The works of this artist are designed to be walked through, inhabited, smelled and felt. By going through the art object, the viewer (in this case, the participant) experiences his or her own body, mind and senses. Nieto debates the plight of humanity –  the temperature, movement and language of things we come into contact with are the essence of our existence.

Image.NietoBody

I observed school groups interacting with The Body That Carries Me. I heard students shouting with glee as they sank into soft materials, holding onto the seemingly fragile netting. Were these children experiencing the insides of their own bodies? Was it warm or cold? Did they feel free or trapped? Just as the students try grabbing onto whatever they can to stabilize themselves and run forward, I feel that this is what we do every day of our lives.

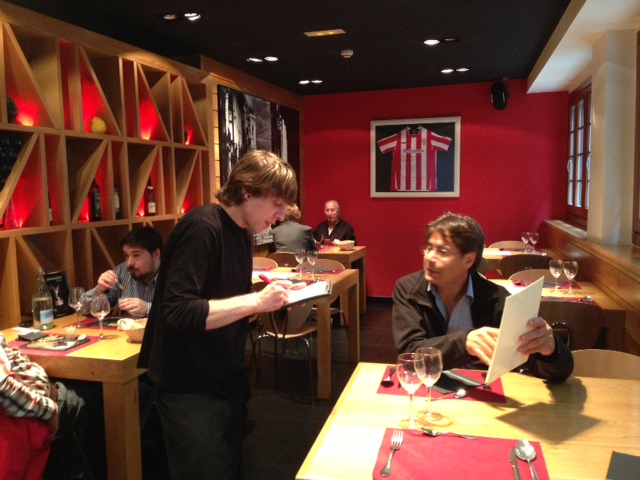
Like children, we were overtaken by hunger pangs and desperately needed to eat. We found Batzokia, a restaurant located at Tenderia, 17 Bajo. From the moment we walked in and were seated, it felt as though our hosts had been waiting for us (this was an impromptu discovery, btw). We chose the menu de el dia (menu of the day). It cost 20 euros per person, including wine.

Image.BatzokiaWait.Vic

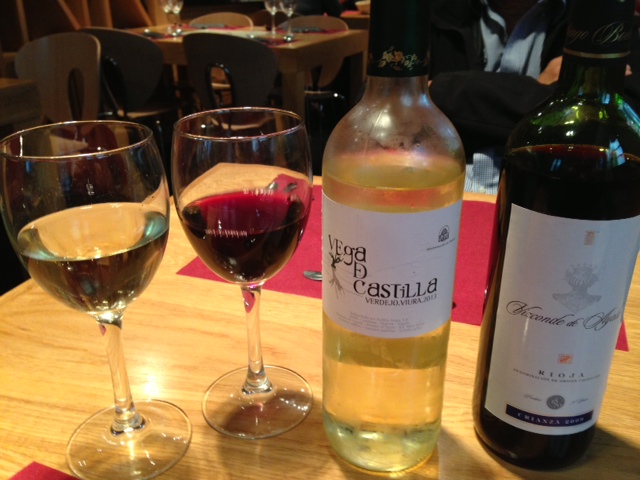
I ordered white and my husband ordered red wine. The wine was excellent, dry with a smooth finish – this is how I like it. I was shocked to learn that both bottles would be left on the table throughout our meal – thank God we traveled by bus that day!

Image.Batzokia.WineatTable

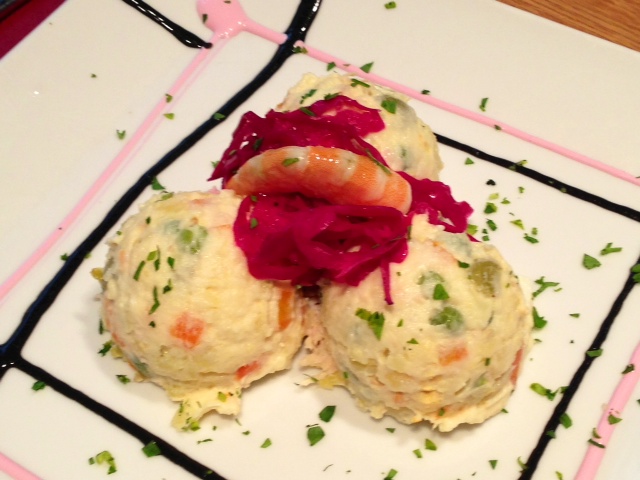
For the appetizer, I ordered a potato salad. If this isn’t art on a plate, I don’t know what is! All ingredients in the foods prepared at Batzokia are locally grown, in the Basque region of Northern Spain. The potatoes tasted earthy; the shrimp was wild and sweet (unlike the bland flavors of farm-raised shrimp).

Image.BatzokiaPot.

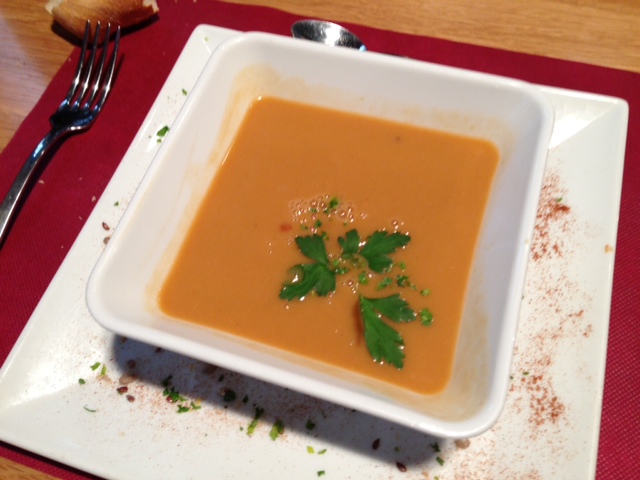
Victor (my husband) ordered seafood chowder – the flavors were subtle, fresh and robust.

Image.Batzokia.Soup

The main dish consisted of filet of codfish. It had that melt-in-your-mouth freshness. Practically jumping out of the ocean and onto our plates, the baccala was not “fresh frozen” as in most restaurants.

Image.BatzokiaFish

Finally – the part I die for – DESSERT! It consisted of puff pastry with homemade chocolate gelato and Chantilly cream. How’s that for a grand finale?

Image.Batzokia.Dessert

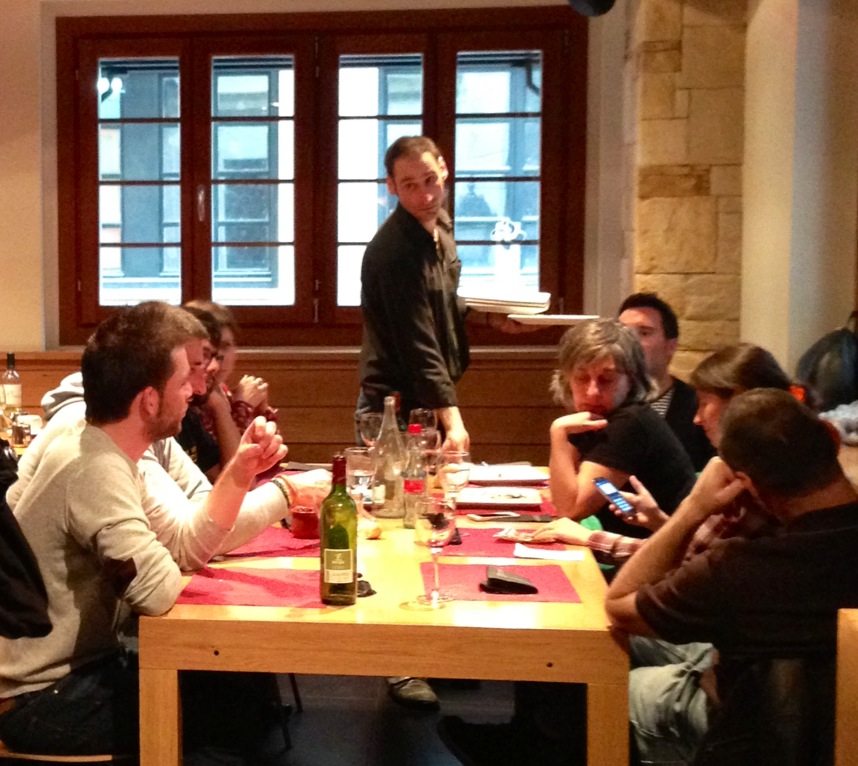
The ambiance at Batzokia is casual, cool and trendy. The servers are extremely professional with their attention to detail and their warm personalities. Based on your preferences, you hear their true opinions on what dish might be best for you.

Image.Batzokiaguests

 I enjoyed Bilbao so much that I would hop on a plane and fly back there just for the day!

For info on Guggenheim Bilbao, go to: http://www.guggenheim-bilbao.es/
For info on Batzokia Restaurant, go to: http://www.baibatzokia.com

Text and Photographs ©2014 Nancy DeLucia Real
Exception: Photograph of Raft of the Medusa by Théodore Géricault is in the public domain of the United States, and those countries with a copyright term of life of the author plus 100 years or less.


Guava & Cream Cheese (Cascos de Guayaba con Queso Crema)

In Desserts, Creams & Sauces, Fruit and Jams On April 23, 2012 0 Comments

Directly from tropical Cuba, Guavas & Cream Cheese is a unique dessert. Don’t know about you, but I wasn’t aware of this dessert until I discovered Cuban cuisine.

The fresh guavas are stewed with sugar and topped with cream cheese in individual serving bowls. It’s as easy as that!

Make this unique dessert and it’ll be the hit of your next dinner party – Buen Provecho.

Prep time: 30 minutes
Serves: 4 to 6

Ingredients:
8 to 12 ripe guavas
1 to 1-1/2 cups water
1 cup unbleached, granulated sugar
6 ounces whipped cream cheese
6 to 8 sprigs of fresh mint leaves

1. Wash and dry the guavas.

2. Cut each guava in half; remove and discard inner pulp and seeds.

3. Place the guava halves, hollow or concave sides-up, in an 8-quart sauce pot.

4. Cover the guavas with enough water so that it rises up the fruit halfway.

5. Bring them to a boil and cook on medium heat for 10 minutes.

6. After 10 minutes, sprinkle the sugar evenly over the guavas.

7. Cook on low heat, uncovered, until sugar has turned into a thick syrup. Cool completely.

To assemble:

1. Place 4 guava halves in each individual glass or porcelain serving bowl.

2. Divide the cooled syrup evenly among each serving.

3. Cover each bowl with plastic wrap and chill at least 2 hours or overnight.

4. At serving time, add 1 teaspoon whipped cream cheese to each guava half. Garnish mint leaves.

Text & Photograph ©2012 Nancy DeLucia Real

Snowballs

In Desserts, Creams & Sauces, Fruit and Jams, Fun Foods, Holidays On December 11, 2011 0 Comments

ENTER OUR KITCHEN, WATCH & LEARN

Every year in December, my thoughts return to Montreal where I spent my early childhood. In Canada, the holiday season was synonymous with my cousins and me enjoying those great snowball fights.

Here in Los Angeles, these delicious Snowballs are made with bananas that are cut into chunks, rolled in sour cream and then in coconut. Rather than throwing these Snowballs at anyone, it’s best to serve them on a festive platter, surrounded by lush, fresh strawberries.

While Snowballs are fun to make, if anyone’s around during the process, these treats will never make it to your holiday table. But if they do, they’ll be the hit of the party – guaranteed!

Prep time: 15 minutes
Makes: 15 snowballs (or pieces)
Serves 4 to 6

Ingredients:
3 ripe bananas
Juice of one lemon or lime
8 ounces sour cream
2 tablespoons Amaretto liqueur
3 cups Baker’s Angel Flake Coconut®
1 quart fresh, whole strawberries

1. Peel and cut the bananas into one-inch chunks (approximately 5 chunks per banana).

2. Place bananas in a shallow bowl and gently toss in the lemon or lime juice.

3. In a separate, shallow 10-inch bowl, gently stir together the sour cream and Amaretto liqueur; set aside.

4. Place coconut in a separate 10 or 12-inch shallow bowl and set aside.

5. Using two forks, lightly coat each banana chunk with the sour cream mixture followed by the coconut (roll each banana chunk in the coconut until it is thoroughly coated and looks like a snowball).

6. Place snowball on a serving platter. Repeat with remaining banana chunks and arrange in a mound on the serving platter.

7. Fan each strawberry by making two vertical cuts into it. Arrange strawberries in a circle around the Snowballs.

8. Refrigerate Snowballs up to three hours (covered in plastic wrap) or serve immediately.

Text & Photograph ©2011 Nancy DeLucia Real

Irish Whiskey Cake with Avocado Cream Frosting

In Cakes & Cupcakes, Holidays On March 12, 2011 0 Comments

When I first imagined making this scrumptious cake, I thought it should be round. But then I thought, “Naaah, decorated cupcakes are more fun.” I also bought a clover leaf cake pan and delved right into the festive spirit of St. Patrick’s Day.

My version of this springtime cake contains no butter – the “cream” in the frosting comes from fresh avocado with an added tangy surprise. The result is a rich and delicious Irish Whiskey Cake. You and your guests can reach for that second or third piece guilt free – enjoy!

For the Cake:
2 ¾ cups all-purpose, unbleached flour
2 ½ teaspoons baking powder
¾ teaspoon salt
1 ¾ cups granulated sugar
½ cup vegetable oil
5 large eggs
½ cup whiskey
1 teaspoon vanilla extract
zest of 1 lemon

1. Preheat oven to 325F˚. Grease and flour either a 9-inch round cake pan or a clover leaf cake pan; set aside. If making cupcakes, line the muffin pans with baking cups and set aside.

2. In a 1-quart bowl, combine the flour, baking powder and salt; set aside.

3. In either a stand mixer fitted with a bowl or a conventional mixing bowl (using a hand mixer), beat together the sugar, oil, eggs, whiskey, vanilla and lemon zest until smooth.

4. On low speed, stir in the dry ingredients and mix until batter is smooth, about 2 to 3 minutes.

5. Pour the batter into desired cake pan or into the muffin cups.

6. Place cake pan on a rack positioned in center of oven and bake 30 to 35 minutes or until knife inserted in center comes out clean.

7. Alternatively, place muffin pans on top and bottom oven racks and bake 20 to 25 minutes or until knife inserted in center of one cupcake comes out clean.

8. Transfer cake pan or muffin pans to counter and set aside to cool.

9. When cake is completely cooled, unmold it and transfer to a serving platter; set aside.

For the Avocado Cream Frosting:
2/3 cup freshly mashed avocado
5½ to 6½ cups powdered sugar
2 to 2½ tablespoons freshly squeezed lemon juice
One clover-leaf shaped cake pan, one 10-inch springform pan or two 12-cup muffin pans
One 4.25-ounce Decorating Green Icing Tube fitted with a straight tip (optional)

1. In a 1-quart mixing bowl, whisk together the mashed avocado (with all lumps broken down) and 5½ cups of the powdered sugar.

2. Mix in the lemon juice and whisk until smooth. If frosting appears to thin, add a little more sugar and whisk until consistency is smooth and creamy but firm enough to hold its shape on top of cake or cupcakes.

3. With a spatula or flat, round-tipped knife, frost the cake or cupcakes.

4. Using the tube fitted with a tip, make decorations over frosting.

The cake or cupcakes can be served the same day or made a day ahead, covered in a foil tent and refrigerated.

To foil tent a cake, place 6 to 8 toothpicks halfway into cake and spaced out throughout cake surface. Create a tent with aluminum foil sheets that are large enough to cover cake and secure around platter edges.

*Note – A 10 or 11-inch square cake pan can be used as well.

Text and Photographs ©2011 Nancy DeLucia Real