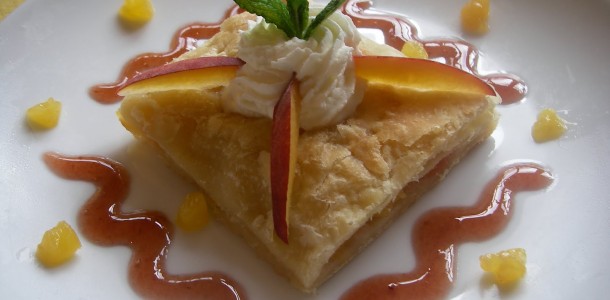
Over the past ten years or so, I’ve been asked a zillion times, “Nancy, what’s your favorite dessert?” I always respond by saying, “classic American fruit pies”. In my opinion, there’s no better dessert than fresh fruit encased in flaky pie crust, topped with whipped cream or vanilla ice cream.
Since it’s the season for strawberries and rhubarb, here’s my classic and unique Strawberry Rhubarb Pie. I’ve made it since I was a teenager – from scratch. Just a few days ago, I made this for my Italian friends. It was the first time they had the strawberry-rhubarb combo and they loved it!
Prep time: 40 to 50 minutes
Bake time: 40 to 50 minutes
Makes: One 9-inch pie
FIRST, PREPARE THE PASTRY-
INGREDIENTS & INSTRUCTIONS FOR THE PASTRY:
2-2/3 cups all-purpose, unbleached flour
1 teaspoon salt
1/8 teaspoon ground cinnamon
3/4 cup sunflower or safflower oil
4 tablespoons cold water
Three 2-inch wide aluminum foil strips (to place over pastry edges during baking)
One 9-inch pie plate
1. In a 4-quart mixing bowl, combine the flour, salt & cinnamon.
2. Add the oil and, using a pastry cutter, mix until flour and oil combine to form pea-sized clusters.
3. Add water, 1 tablespoon at a time; mix until dough amalgamates and sides of bowl are clean. If needed, add 1 more tablespoon water.
4. Gather dough with hands; separate into two equal balls.
5. Wrap each dough ball in plastic and place in freezer for 10 to 12 minutes.
Meanwhile, prepare the strawberry-rhubarb filling-
INGREDIENTS & INSTRUCTIONS FOR THE STRAWBERRY-RHUBARB FILLING:
1-1/2 cups granulated, unbleached sugar
1/2 cup all-purpose, unbleached flour
2-1/2 cups chopped fresh rhubarb stalks (1/2-inch pieces)
2-1/2 cups chopped fresh strawberries (3/4-inch pieces, slightly larger than the rhubarb pieces)
1 teaspoon pure vanilla extract
1. In a 1-quart mixing bowl, combine the sugar and flour; set aside.
2. In a 6-quart mixing bowl, combine the chopped rhubarb and strawberries.
3. Gently stir in the sugar-flour mixture. Add the vanilla and gently stir; set aside.
NEXT, ROLL OUT THE PASTRY AND ASSEMBLE THE PIE:
1. Transfer one dough ball from the freezer to the refrigerator.
2. Unwrap the remaining dough ball and, on a flat, floured surface, flatten it to a 5-inch circle.
3. Place the pastry dough circle in between two lightly-floured 15-inch long waxed paper sheets.
4. Using a rolling pin, roll pastry from the center and outwards. After two to three rolling motions, peel off top waxed paper sheet and lightly flour the pastry.
5. Replace the waxed paper sheet over the pastry and flip.
6. Remove second waxed paper sheet & lightly flour pastry. Cover with waxed paper sheet again.
7. Continue rolling & flouring the pastry until it is 3 inches larger than the diameter of pie plate edges.
8. Remove top waxed paper sheet from rolled-out pastry. With one hand underneath the bottom waxed paper sheet & other hand over pastry surface, make a quick flip onto the pie plate.
9. Gently and slowly peel off the remaining waxed paper sheet from the pastry.
10. Carefully fit the pastry into pie plate edges. Using a fork, poke random holes in pastry; set aside.
11. Preheat oven to 425°F.
12. Repeat above rolling instructions with second pastry dough. Keeping the pastry inside paper sheets, set it aside.
13. Meanwhile, gently stir the strawberry-rhubarb filling and then carefully spoon it over pastry set in pie plate. Carefully flip second pastry over filling; peel off the waxed paper sheet.
14. Trim pastry edges to one-inch overhang. Turn pastry edges under.
15. With fingers, crimp or pinch the edges, creating fluted shapes. Cover fluted pastry edges with aluminum foil strips.
16. Place pie on a rack positioned in center of oven.
17. Bake 40 to 50 minutes or until fruit bubbles. Remove foil strips during last 5 to 8 minutes of baking.
18. Transfer pie to counter to cool. Serve warm or cold with 5-Minute Whipped Cream (found in our Recipes, under Desserts, Creams & Sauces), vanilla ice cream or garnish of your choice.
Text & Photograph ©2012 Nancy DeLucia Real


 Nancy DeLucia Real is an art historian and chef. She has led culinary courses at the Italian Cultural Institute, The Getty Center and The Getty Villa and is a former member of the Culinary Historians of Southern California. Nancy's gastronomy training took place in the heart of Italy under the tutelage of her grandmother. She has taught international cuisine at Williams Sonoma and Sur la Table Stores. Nancy's art history & culinary courses are ongoing at various institutions. She also teaches private cooking classes.

