All Posts By: NANCY DeLUCIA REAL

Home » Articles posted by NANCY DeLUCIA REAL (Page 25)

Tom George Restaurant – 7th & Grand, Downtown Los Angeles

In Nancy's Articles On January 17, 2017 0 Comments

I’m so glad Tom George, a Cal-Italian-Hungarian restaurant – decided to take its vibe to downtown Los Angeles. One of its owners, George, stated that this LA eatery is one of his newest babies – a distant relation to other restaurants he operates in Budapest, Hungary.

As soon as you walk into Tom George, the “red” ambiance immediately puts a smile on your face.
Image.TGBarpeople

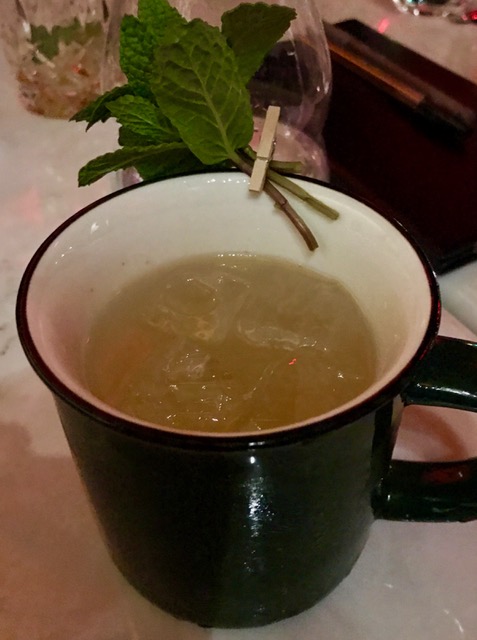
How can you go wrong with a red bar? Its warmth makes it all the more easy to reach out for one of its signature drinks – the “I Like Hendricks”!
Image.ILikeHendricks
Like? It was more of an immediate love affair with this drink whose name boasts gin, gin, gin – laced with lemonade! I need two more, please.

Wondering, “what’s the Italian here?” For starters, we ordered a pizza that looked like it just arrived from Naples.
TGPizza
Our Pizza Margherita’s crust was authentically wood-fired and topped with sweet tomatoes and fresh basil. The Cal-Italian element is the addition of goat cheese, instead of mozzarella. Neapolitans will definitely frown on this – only because they didn’t think of this innovation!

BTW, the Pizza Margherita was indeed invented in Naples in 1889 by chef Raffaele Esposito of Pizzeria Brandi. It was to honor the visit of Queen Margherita of Savoy, wife of King Umberto I. The pizza’s colors (red, white & green) were inspired by the Italian flag.

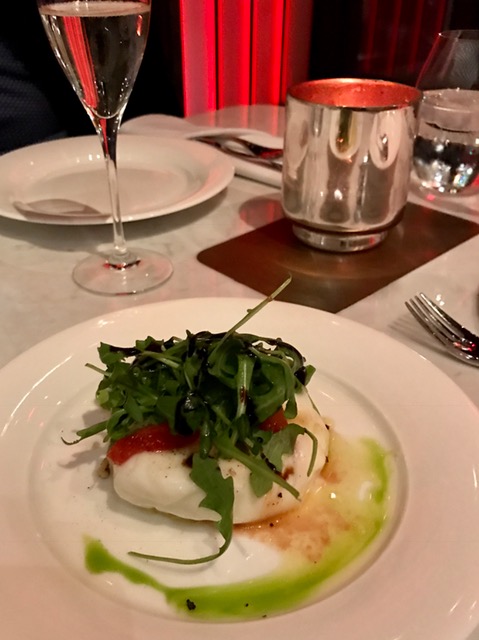
Next up – the burrata. And yes, it’s as good as it looks.
Image.TGBurrata

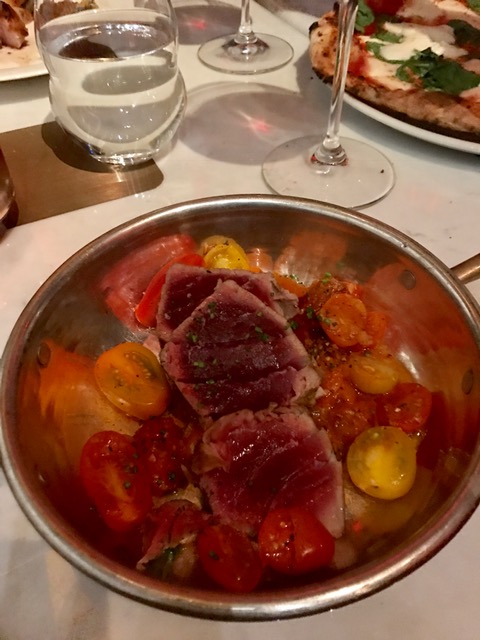
If you’re on a no-carbs diet, as I am, the Ahi Tuna with roasted tomatoes (a special request, on my part) is a definite specialty here. It’s so fresh that it melts in your mouth.
Image.TGTuna
While I was enjoying light gourmet fare, I detected a distinct aroma of truffles. Now, this is right after my Hendricks drink and a couple of glasses of wine. Man – I thought I died and went to gastronomy heaven! I barely heard someone saying that gnudi, a Hungarian specialty, are made with ricotta. Tom George serves these smothered in porcini sauce, topped with Parmigiano-Reggiano cheese and black truffles. This dish crowned our food orgy. Don’t these gnudi look scrumptious?
Image.TGGnudi
Gnudi are not to be confused with gnocchi, Italian potato dumplings. And, of course, Tom George proudly serves the best goulash you can find anywhere!

Finally, here’s one of the best flourless, chocolate cakes I’ve tasted anywhere.
Image.TGChocCake
As for George of Tom George? He’s your warm, Hungarian host who’ll ensure high quality all around, especially with his attentive staff. We were served by Chris and Rosina who were on top of every minute detail. I was definitely wowed!
NR & George
Note: Last Saturday, we decided to go downtown from LA’s Westside by Metro Rail. We exited at 7th Street Metro Rail Station & walked two blocks to Tom George. Can’t wait to go back to the restaurant by Metro Rail, enjoy my “I Like Hendricks” and not worry about driving!

Tom George
707 South Grand Avenue
Los Angeles, CA. 90017
424.362.6263
tomgeorgela.com

Text & Photograph ©2017 Nancy DeLucia Real

Fresh & Creamy Pea Soup

In Soups and Stews On January 9, 2017 0 Comments

I hope you weren’t thinking of using canned or frozen peas to make a great-tasting pea soup.
image-peasnobrand

With fresh peas and a few more ingredients, you’ll enjoy a great meal in no time. Complement this gourmet soup with rustic French or Italian bread and your favorite wine. Bon appetit!

Prep time:10 minutes
Cook time:15 to 20 minutes
Serves: 2 to 4

Ingredients:
2 tablespoons extra virgin olive oil
3/4 cup finely chopped white or brown onion
2 to 3 cups cold water
3 cups fresh, shelled green peas
salt and ground black pepper, to taste
Dash grated nutmeg
1 cube vegetable or chicken bouillon
3 tablespoons heavy whipping cream (optional)
1 carrot, peeled and thinly sliced
2 to 4 fresh mint leaf sprigs

Prepare the Soup:
1. In a 4-quart sauce pot, heat the oil (it should not smoke).

2. When oil is hot, add the chopped onion; stir-fry onion with wooden spoon until it is translucent – about 2 minutes.

3. When onion is translucent, pour in 2 cups of the water and stir in the peas.

4. Bring the soup to a boil.

5. When the soup comes to a boil, add salt, black pepper and nutmeg.

6. Cook the soup on medium-high, making sure it boils, for about 5 minutes.

7. After 5 minutes, add 1 cube vegetable or chicken bouillon; set heat on medium to medium-low and simmer the soup for about 10 minutes or until peas are tender.

8. When peas are tender, taste the soup. If another bouillon cube is needed, you may add it at this point.

9. Set the sauce pot with soup aside on a cold burner.

Puree/Blend the Soup:
1. When soup is lukewarm, transfer one-third of it to a blender.

2. Add cream to soup in blender; blend soup until smooth or slightly lumpy-smooth, per taste.

3. Transfer this first batch of soup to a large glass or porcelain bowl; repeat blending the remaining soup in two more batches.

4. Transfer the last two batches to bowl.

5. Return the blended soup to the sauce pot; bring to a boil.

6. When soup boils, stir in the sliced carrots and cook for 2 minutes.

7. Serve soup immediately; garnish with fresh mint leaf sprig.
Text & Photograph ©2017 Nancy DeLucia Real
New Year’s Pie & Show “Waitress”

In Holidays, Pies & Sweet Tarts On December 28, 2016 0 Comments

Here’s a delicious and fun way to end 2016 and celebrate New Year 2017 – catch the show, Waitress, now on Broadway. And since the show is all about pies, no doubt you’ll be cravin’ pie afterwards.
image-waitressmusical

Simply make your own apple pie in advance. After the show, just hang out with your friends and enjoy pie with the bubbly! Check out this easy apple pie recipe with pre-made crust from Trader Joe’s®.

image-traderjoespiecrusts

Prep time: 30 minutes (cutting apples & assembling the pie)
Bake time: 35 to 45 minutes
Makes: One 9-inch pie

Ingredients:
6 large apples (Granny Smith, Pippin or a mixed variety)
1/4 cup unbleached, all-purpose flour
3/4 cup granulated sugar (use unbleached or bleached sugar)
1 teaspoon ground cinnamon
1/2 teaspoon ground allspice
2 Trader Joe’s® Gourmet Pie Crusts (follow thawing instructions, per package)
One 9-inch pie plate (discardable aluminum, porcelain or glass)
3 to 4 one-inch wide aluminum foil strips (for pie edges & to prevent burning)

Prepare the Apples:
1. Preheat oven to 425°F.

2. Peel and cut apples into fourths; remove cores and discard.

3. Thinly slice the apples and set them aside in a large mixing bowl.

4. In a small mixing bowl, combine the flour, sugar, cinnamon and allspice.

5. Gently stir the dry flour-sugar-spice ingredients into the apples until uniform; set aside.

Assemble the Pie:
1. Gently unfold the thawed pie pastry (crusts).

2. Remove the top plastic wrap of one pastry.

3. Place inverted pie plate onto pastry.

4. With one hand underneath the bottom plastic wrap and the other on inverted plate, quickly flip the plate over on a work surface.

5. Remove the plastic wrap and discard.

6. Using a fork, poke random holes in bottom pie pastry in plate.

7. Using a large serving spoon, transfer the apples (in a mound – do not pack them down) onto the pie pastry in plate. Set aside.

8. Repeat removal of plastic wrap of second pie pastry. With one hand underneath plastic wrap and the other over pastry, quickly flip it over and onto the apple filling in plate.

9. The pastry should hang over plate edges by 3/4 to 1 inch. If it is longer than this, using a knife, gently trim it.

10. Using fingers, turn edges of pastry underneath and crimp the edges all around pie plate. To crimp edges, gently press pastry in between fingertips to seal the pie.

11. Cover pastry edges with aluminum foil strips.

12. Place pie on a rack positioned in center of oven and bake as follows:
Aluminum plate – 45 minutes
Glass or porcelain plate – 35 to 40 minutes (glass and porcelain cook faster, as they retain more heat).

13. During last 5 minutes of baking, remove aluminum foil strips so that edges can turn light golden brown.

Tip: To check doneness of pie, insert a pointed knife in center. If it goes through apples easily, it means they are tender and cooked. If not, bake for an additional 5 to 6 minutes.
Text and Pie on Blue Background Photograph ©2016 Nancy DeLucia Real
Tomato Salad with Dill (inspired by IPAA Restaurant)

In Salads On December 16, 2016 0 Comments

Just a few days ago my husband and I went to IPAA Cocina Mexicana Restaurant in Tijuana, Baja California, Mexico. I loved the private terrace dining style. If you want a romantic dinner, this is the place!

image-ipaaterracetables

The restaurant’s interiors are high-end – no cutting corners here. And, the astounding mural evokes prehistoric themes.
image-ipaa-mural

IPAA’s cuisine represents the natural foods grown in Baja California for thousands of years. It’s classified as fine, Baja-Med cuisine. The menu changes on a daily basis and the six-course dinner with wine-pairing is fantastic!

We loved the Tomato Salad with Dill so much, that I made it at home (with my own guess work on ingredients). Here’s my version:

Prep time: 10 to 15 minutes
Serves: 4

Ingredients:
2 large green tomatoes (found at farmers’ markets)
1 large yellow tomato
10 to 12 cherry tomatoes
-OR-
1 large, red, vine-ripened tomato
Salt and ground black pepper, to taste
4 to 5 tablespoons extra virgin olive oil
1 tablespoon fresh, finely-chopped dill weed

Directions:
1. Using a sharp knife, cut the green tomatoes into fourths and then into eighths.

2. Transfer the green tomato pieces to a 2 to 3-quart glass or porcelain bowl; set aside.

3. Cut the yellow tomato into fourths and then into eighths; add them to the green tomatoes in bowl; set aside.

4. Cut the cherry tomatoes in half and add them to the tomatoes in bowl.; set aside.

5. Alternatively, if using the large, red tomato, cut it into eighths. Add the red tomato pieces to the other tomatoes in bowl.

6. Add salt and ground black pepper to the tomatoes, followed by the olive oil and fresh dill weed.

7. Toss the salad and serve immediately as a side dish to meat, chicken, fish or as part of a vegetarian meal.

Note: IPAA Cocina Mexican Restaurant website here-https://translate.google.com/translate?hl=en&sl=es&u=http://www.ipaa.mx/&prev=search

Text and Photograph ©2016 Nancy DeLucia Real
Stuffed Mushrooms

In Appetizers / Starters, Holidays, Vegetables On December 8, 2016 0 Comments

Need a great starter to go with the bubbly at Christmastime? Assemble these stuffed mushrooms a few hours ahead and refrigerate them. At serving time, preheat the oven and bake them. Made with all-vegetarian ingredients, the mushrooms will be devoured in no time. Enjoy and Merry Christmas!

Prep time (stuffing): 15 minutes
Bake time: 15 to 17 minutes
Makes 12 to 14 stuffed mushrooms

Ingredients:
One 8-ounce package white mushrooms, rinsed and patted dry with paper towels
3 tablespoons olive oil
1/2 cup finely-chopped brown or white onion
3 to 4 slices day-old Italian bread
1 large egg, beaten
3 tablespoons grated Pecorino-Romano cheese
2 to 3 tablespoons minced, fresh mint leaves
1/4 teaspoon salt
Dash ground black pepper

Directions for the Stuffing:
1. Remove stems from mushroom caps; finely chop the stems and set aside in a small bowl.

2. In a 10 or 12-inch skillet, heat the oil on high.

3. As soon as the oil is hot (it should not smoke), lower it to medium-high and stir in the chopped mushroom stems.

4. Using a wooden spoon or cooking spatula, stir-fry the chopped mushroom stems on medium-high heat for about 2 minutes.

5. After 2 minutes, add the chopped onion and stir-fry for an additional 2 minutes or until onion is translucent.

6. Transfer the mushroom-onion mixture to a bowl – set aside to cool for a few minutes.

7. Meanwhile, preheat the oven to 400°F.

8. Take 3 bread slices and quickly pass them under cold water; squeeze the excess water out of bread slices.

9. Discard the crusts and crumble the softened bread into a 2-cup bowl.

10. Add the beaten egg, grated cheese, minced mint leaves, salt and black pepper; stir to combine.

11. Stir in the mushroom-onion mixture. If mixture is too wet and does not amalgamate, soak the remaining bread slice (discard crusts) and crumble it into the mushroom stuffing.

12. Taste stuffing for salt level. If needed, add a tiny amount of salt.

13. Divide the stuffing onto the inverted mushroom caps.

Directions for Baking the Stuffed Mushrooms:

1. Oil a baking sheet and place the stuffed mushrooms (stuffing side up) on it.

2. Set the baking sheet with stuffed mushrooms on a rack positioned in center of oven.

3. Bake the mushrooms for 15 minutes.

4. After 15 minutes, check to see if stuffed mushrooms have turned light golden brown. If not, bake them for an additional 2 minutes. Serve stuffed mushrooms hot.

Text and Photograph ©2016 Nancy DeLucia Real