

I’ve been making this eggplant recipe since I was 9 years old and living in Campania!
My Nonna (grandmother) used day-old bread and eggplant pulp – diced and fried. She then mixed the breadcrumbs, fried eggplant pulp, eggs, Pecorino-Romano cheese and other basic ingredients. This became the stuffing which was placed back into the shells and deep-fried.
Wondering how the eggplant is stuffed and baked? Read on… it’s worth it! No restaurant serves Neapolitan Stuffed Eggplant.
Prep time: 30 minutes (for frying & cooling) & 30 minutes (for baking)
Makes: 12 servings (leftovers store in airtight container in refrigerator up to 5 days)
Ingredients:
6 Japanese eggplant (small eggplant)
1.5 tablespoons salt
1 quart safflower or sunflower oil
1 day-old Italian bread or French baguette (outer skins cut & discarded) & crumbled with hands
6 large eggs, beaten
1 to 1-1/3 cups grated sharp, imported Pecorino-Romano cheese
6 large basil leaves, finely chopped
Dash grated nutmeg
1/8 teaspoon ground black pepper
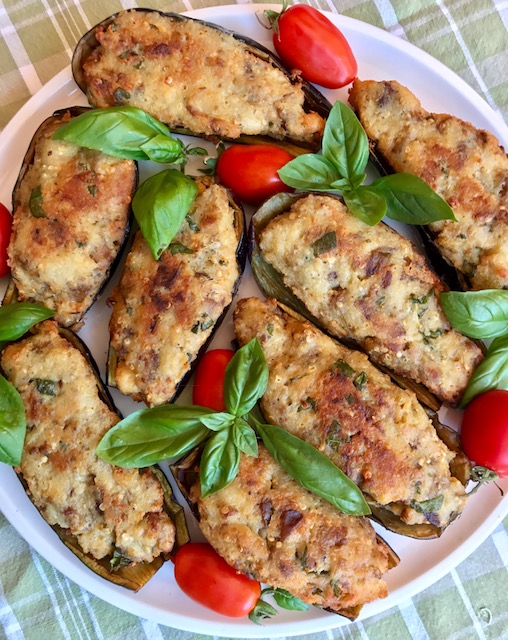
Garnish for the Non-Baked Version (in photograph below):
5 to 7 cherry tomatoes or home grown San Marzano tomatoes
5 to 6 fresh basil leaf sprigs, for garnish
Garnish for the Traditional, Baked Version with Tomatoes (in above photograph):
One 32-ounce can diced San Marzano tomatoes
2 tablespoons extra virgin olive oil
1/4 teaspoon salt
1 clove garlic, sliced into 3 to 4 pieces
5 to 6 fresh basil leaf sprigs, for garnish
Cut the Eggplant:
1. Rinse and pat dry the eggplant with paper towels.
2. Remove and discard top end with leaf/stem.
3. Vertically cut the eggplant in half.
4. Take one cut half, insert pointed tip of sharp knife 1/8-inch inside eggplant shell.
5. Using knife tip, cut around the pulp until it comes out in one piece – this may take a little practice.
6. Cut pulp vertically into 1/2-inch strips. Cut strips into 1/2-inch cubes.
7. Set eggplant cubes aside in a colander.
8. Repeat cutting procedure with remaining eggplant. Set aside in colander.
Salt & Fry the Eggplant:
1. Sprinkle the salt all over eggplant cubes in colander & gently toss with hands; let eggplant drain in colander set over a bowl for 20 minutes.
2. After 20 minutes, using cooks’ plastic gloves, take a handful of eggplant cubes and squeeze out the bitter juices over a sink; set eggplant cubes aside in a bowl.
3. Repeat squeezing out the bitter juices with remaining eggplant cubes.
4. Pour the sunflower or safflower oil into a 12-inch frying skillet (preferably stainless steel, as this heats up quickly).
5. Heat the oil.
6. When oil is hot but does not smoke, test one eggplant cube by gently lowering it into oil. If it begins to sizzle, the oil is ready.
7. Fry the eggplant cubes in 2 to 3 batches – eggplant cubes should turn golden brown (not dark brown).
8. Transfer fried eggplant batch to a paper towel-lined platter.
9. After transferring first batch, cover it with paper towels & lay the second batch over them. Repeat with third batch.
10. When eggplant is fried, let it cool so that it is warm to the touch – about 10 to 15 minutes.
11. Save the oil and skillet for frying the stuffed eggplant later.
Prepare Stuffing:
1. Preheat oven to 375°F.
2. Place the crumbled bread & the fried eggplant cubes in a 12-cup mixing bowl; set aside.
3. In a separate bowl, using a whisk or a fork, beat the eggs with 1 cup Pecorino Romano cheese.
4. Gently stir the egg-cheese mixture into the breadcrumbs & eggplant in bowl.
5. Add the chopped basil leaves, dash nutmeg & black pepper.
6. Taste some of the stuffing & check it for cheese level. If needed, add remaining 1/3 cup cheese & a little salt.
Stuff the Eggplant Shells:
1. Divide the stuffing into 12 portions – you may be able to do this visually.
2. Place a portion of the stuffing inside eggplant shell, gently patting it down. It should look a little rounded on top. Set the stuffed eggplant shell, face up, on a platter.
3. Meanwhile, stuff the remaining eggplant shells, setting them aside on the platter.
Fry the Eggplant:
1. Reheat the oil in skillet. When oil is hot but does not smoke, gently and carefully lower one stuffed eggplant, face down, into oil. Repeat with a few more stuffed eggplants until they fit comfortably in skillet (about 5 pieces).
2. Fry the eggplant for about 3 minutes; check underside with a spatula. If eggplant is not golden brown, fry it for an additional 2 to 3 minutes, checking occasionally.
3. When eggplants look golden brown on bottom, using 2 large forks or 1 fork and a spatula, gently turn them over; fry the shell side for 3 to 4 minutes.
4. At this point, you can serve the stuffed eggplant without baking it – it will be drier than the traditional, baked version:
For this Non-Baked Version, transfer stuffed eggplant to a platter and garnish with fresh tomatoes & basil sprigs:
For the Traditional Baked Version with Tomatoes (featured in photograph at the top of this page):
1. In a 16X9-inch Pyrex baking dish, spread out half of the canned, diced tomatoes.
2. Sprinkle olive oil over tomatoes, followed by salt and garlic.
3. Lay the stuffed eggplant over the tomato mixture in Pyrex dish.
4. Evenly spread the remaining diced tomatoes over stuffed eggplant in Pyrex dish. Add a dash of salt.
5. Cover the eggplant tightly with aluminum foil & bake on a rack set in center of oven for 30 minutes.
6. After 30 minutes, transfer the Pyrex dish with eggplant to a rack or trivet on kitchen counter.
7. Let the stuffed eggplant cool down for about 10 minutes.
8. You can serve this Neapolitan Stuffed Eggplant as an appetizer (by itself) or as lunch/dinner, accompanied by a green salad on the side.
Buon Appetito!
Italian Wine Pairings: Greco di Tufo (white wine) or Aglianico (red wine). Both wines are from the area of Naples in the region of Campania, Italy.
Text & Photographs ©2017 Nancy DeLucia Real


 Nancy DeLucia Real is an art historian and chef. She has led culinary courses at the Italian Cultural Institute, The Getty Center and The Getty Villa and is a former member of the Culinary Historians of Southern California. Nancy's gastronomy training took place in the heart of Italy under the tutelage of her grandmother. She has taught international cuisine at Williams Sonoma and Sur la Table Stores. Nancy's art history & culinary courses are ongoing at various institutions. She also teaches private cooking classes.

