Category:  Fun Foods

Home » Archive by category "Fun Foods" (Page 7)

Olives Stuffed with Marinated Anchovies & Piquillo Peppers

In Appetizers / Starters, Fun Foods On July 22, 2014 0 Comments

Although I’ve been back from Spain for weeks, I’m still craving its exquisite gastronomy.

I discovered this wonderful tapa (appetizer) in Madrid – green olives, stuffed with marinated anchovies and piquillo peppers. The piquillo pepper is a variety of chile that is sweet and is void of heat. It’s absolutely exquisite in this appetizer.

Here’s how to start your next Spanish dinner – serve Olives Stuffed with Marinated Anchovies & Piquillo Peppers alongside Sangria – the Spanish Cooler (previously published on this website).

Prep time: 15 to 20 minutes
Makes: 20 pieces

Ingredients:
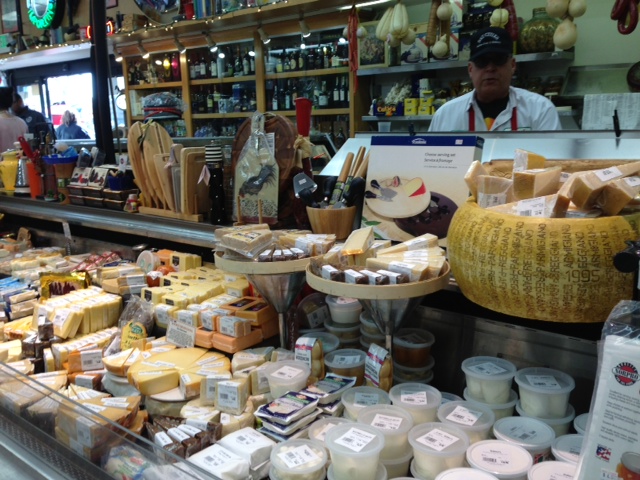
20 large green, pitted olives from a Spanish or Italian specialty foods stores (sold by the pound, in brine)
20 marinated Spanish anchovies (sold at Spanish or Italian specialty foods stores)
One 6-ounce jar of marinated, whole piquillo peppers
20 toothpicks

Prepare the Ingredients:

1. Working on a cutting board, cut each olive in half, lengthwise; set aside.

2. Remove marinated anchovies from package and drain them; set aside.

3. Remove piquillo peppers from jar and drain them in a colander.

4. Pass the peppers under cold water in colander and drain completely.

5. Transfer piquillo peppers to a cutting board; pat them lightly with a paper towel.

6. Cut the piquillo peppers in half or in fourths (cut them in the way they will best fit inside olives).

Stuff the Olives:

1. Take one anchovy and one piece of piquillo peppers; place them inside two olive halves.

2. Secure the olive with a toothpick; place it on a plate.

3. Continue stuffing the remaining olives.

4. Serve immediately or, alternatively, cover the plate of olives with plastic wrap and refrigerate.

5. This starter can be refrigerated up to 4 hours prior to serving.

6. Serve this starter on the same day you have assembled it. Leftovers can be covered in plastic wrap and enjoyed the next day.

Text & Photograph ©2014 Nancy DeLucia Real

Bay Cities Italian Deli & Bakery – Home of “The Godmother”

In Fun Foods, Nancy's Articles On January 18, 2014 0 Comments

BayCities.PeopleDeli
What’s all the hubbub about at Bay Cities Italian Deli & Bakery (hereinafter referred to as “Bay Cities”)? For most people, it’s about the pre-made, fresh salads, pastas, eggplant parmigiana, meatballs, deli meats and desserts. However, among all those selections, there’s one item that is the VIP of all foods here! Standing on its own, Bay Cities even pays tribute to it.

BayCitiesHomeGodmother
It is the “Godmother” sandwich!
BayCities.Godmother

Eating this sandwich is almost surreal – at first, you bite through a golden crust of soft, freshly-baked bread (it’s made every morning on the premises). Then, you sink your teeth into ham, domestic provolone, mozzarella cheese, salami, peppers, lettuce, tomato, mustard, mayonnaise and more. The experience of tasting all these flavors simultaneously is HEAVENLY!

The wonderful personnel at Bay Cities knows that you can’t wait ’til you go home to enjoy the sandwich. So as soon as you dash out the door, you’ll find tables and benches where you can instantly devour the “Godmother” in peace. No distractions, please!

BayCities.PeopleEat

Bay Cities is one of the food sanctuaries I run to for “hard-to-find” ingredients. You name it and Bay Cities has it. Let’s start with the artisanal pasta varieties that I love so much! Are you looking for chiocciole or ziti? Look at how deliziosi they look – hard to choose, isn’t it?

BayCities.ChiocciolePasta

If you want to treat your dinner guests to something unique and colorful, then I suggest the Italian Harvest® Organic Orecchiette. Orecchiette is an Italian word for “little ears.” Orecchiette are from the southern Italian regions of Puglia and Basilicata.

BayCities.Orecchiette

You still need a sauce. You can start by purchasing tomatoes in glass jars. Go ahead and select your favorite brand.

BayCities.TomatoJars

You will probably need premium quality olive oil to start making that sauce.

BayCities.OjaiOils

One of the brands I prefer is none other than our local Ojai Olive Oil Company® 100% Organic olive oil. If I run out of this pure olive oil, I can quickly pick up a bottle or two at Bay Cities in Santa Monica, instead of driving 125 miles into the Topatopa mountains.

Bay Cities also carries my favorite flour for making pizza.
BayCities.AntimoCaputo
If you’re not sure about what cheese you need, Lawrence is the cheese meister and is sure to guide you in the right direction.
BayCities.CheeseWheel

How about dessert? Since it’s a few weeks after Christmas and New Year, Bay Cities still carries Italian traditional panettone used during the holidays.

BayCities.Panettone

Tre Marie Panettone® is my favorite brand. This panettone is moist and rich with luscious ingredients. Notice all the fruit Tre Marie® Panettone contains. I’m sure you’ll want to rush back into Bay Cities to buy a panettone for dessert. You can order a coffee or cappuccino and enjoy it outside before heading back home.

panettone-with-berries20071226panettone-loaf1

Oh – I forgot something! I’ve gotta go back inside to get that beautiful dish I was looking at and, of course, Bay Cities’ delicious, homemade bread. Buon Appetito!

BayCities.Plate&Bread
Text & Photographs ©2014 Nancy DeLucia Real
[except for Antimo Caputo The Chef’s Flour photograph]

Bay Cities Italian Deli & Bakery
1517 Lincoln Boulevard
Santa Monica, CA. 90401
310-395-8279
http://www.baycitiesitaliandeli.com

Easy Pita Breads

In Breads, Crêpes, Pancakes & Puddings, Fun Foods On December 6, 2013 0 Comments

Pita is a slightly leavened bread, flat, round or oval and varied in size. The term pita derives from the Ancient Greek pēktos, meaning “solid” or “clotted”.

For centuries, citizens of Mediterranean and Middle Eastern countries, including Turkey, Israel, Syria and Egypt have made pita bread using a recipe similar to this one. Make these fresh and easy pitas early in the morning – they’re delicious with jam and butter.

Prep time: 30 minutes
Inactive prep time: 20 minutes (dough rising & baking)
Makes: Twelve 8-inch pita breads

Ingredients:
1 envelope Rapid Rise yeast
1 teaspoon granulated sugar
1 to 1½ cups warm water
4 to 4½ cups unbleached, organic white flour
1 tablespoon salt
vegetable or olive oil (to oil a bowl)

Prepare the dough:

1. In a small saucepot, combine the yeast, sugar and water.

2. Cover the saucepot and let yeast mixture rise 8 to 10 minutes or until it looks puffy.

3. Meanwhile, in a 4 to 6-quart mixing bowl, combine the flour and the salt.

4. After the yeast mixture has risen, make a well in the flour mixture. Add the liquid yeast mixture to center of well.

5. Begin mixing in the flour from sides of well into the liquid yeast mixture.

6. A dough should start to form – if dough is too dry and does not amalgamate, add an additional 1/2 cup of water.

7. Gently knead the dough inside bowl until it is smooth (2 to 3 minutes). Set dough aside on a plate, wood board or plastic board.

8. Oil the bowl and return dough to the oiled bowl.

9. Cover the dough in bowl with a clean kitchen cloth or aluminum foil.

10. Set bowl with dough on a wood board on a counter (no granite or marble) away from draft. Alternatively, transfer the covered bowl to a cold oven.

11. Let dough rest for 10 minutes.

12. After 10 minutes, knead the dough for 1 to 2 minutes or until it is smooth and elastic.

13. Divide the dough into 12 equal balls.

Rolling out the dough and baking the pita breads:

1. Preheat oven to 425°F.

2. Oil and flour two 12 X 18-inch baking sheets; set aside.

3. On a lightly floured board and using a rolling pin, flatten one dough ball.

4. Roll out the dough ball into an 8-inch circle and place it on a baking sheet.

5. Repeat rolling remaining dough balls, placing them on baking sheets – each sheet should hold 6 dough circles.

6. Bake the pita breads for 3 to 5 minutes.

7. After 3 to 5 minutes when the pitas puff up slightly or look light golden, turn them over and bake for an additional 2 minutes.

8. Check to see that both sides of pita breads look light golden. If not, bake for an additional 1 to 2 minutes.

9. When pita breads are done, transfer the baking sheets to a counter.

10. Serve the pita breads warm, with jam and butter or with salads. Cold pitas can be filled to make quick appetizers or “pocket” sandwiches.

Text and Photograph ©2013 Nancy DeLucia Real

Fruit n’ Nut Oatmeal Bars (Sugarless & Vegan)

In Cookies, Candies & Sweets, Fun Foods On November 8, 2013 2 Comments

Do you usually crave something sweet with that afternoon coffee, cappuccino, latte or tea? If you’re like me, then you want sweets at all hours of the day. I created these healthy treats in an effort to avoid dairy products, eggs and sugar.

The moist texture of these bars is derived from the maple syrup and honey. Cranberries, walnuts, cinnamon and nutmeg are added to make these bars scrumptious, healthy and vegan. Serve these Fruit n’Nut Oatmeal Bars to your kids – guilt-free!

Prep time: 8 to 10 minutes
Bake time: 25 minutes

Ingredients:
2 cups quick-cooking oatmeal
1 cup all-purpose, unbleached flour
1/4 teaspoon salt
1/2 teaspoon baking soda
3/4 teaspoon cinnamon
Dash grated nutmeg
1/2 to 3/4 cup dried cranberries
1/2 cup chopped walnuts
1/2 cup safflower oil (this can be substituted with canola or sunflower oil)
1/2 cup pure maple syrup
1/4 cup honey
1 teaspoon vanilla

1. Preheat oven to 350°F. Grease and flour an 8 X 8-inch baking dish (alternatively, you can use a rectangular dish measuring approximately 7 X 10 inches).

2. In a 3 or 4-quart mixing bowl, combine the oatmeal, flour, salt, baking soda, spices, cranberries and walnuts.

3. Make a well in the center of the dry ingredients.

4. Add the oil, maple syrup, honey and vanilla to the well in center of the dry ingredients.

5. Mix thoroughly and transfer mixture to the greased baking dish.

6. With your hand, pat down the mixture so that it is even from center to sides of baking dish.

7. Transfer the baking dish to a rack positioned in center of oven.

8. Bake for 25 minutes or until the oatmeal mixture looks golden brown.

9. After 25 minutes, transfer the baking dish to a counter to cool.

10. When completely cool, cut bars to measure 2 X 2 inches and serve.

To store in refrigerator: transfer Fruit n’ Nut Oatmeal Bars to a glass or plastic container with a tight-fitting lid. The bars will keep, refrigerated, up to two weeks.

To freeze: transfer Fruit n’Nut Oatmeal Bars to double, plastic, freezer bags and seal completely. The bars will keep, frozen, up to one month.

Text and Photograph ©2013 Nancy DeLucia Real

Jicama, Watermelon & Cantaloup Salad

In Fruit and Jams, Fun Foods, Salads On August 30, 2013 4 Comments

The idea for this salad sort of sparked when I noticed how boring the jicama, watermelon and cantaloup looked on my kitchen counter.

I was surprised at how delicious and beautiful it all turned out. On our upcoming Labor Day weekend and after all that grilled meat, enjoy this salad as a refreshing fruit course. Stay safe and enjoy the holiday!

Prep time: 15 to 20 minutes
Serves: 4 to 6

Ingredients:
3 cups peeled and julienned jicama (one 5-inch jicama or less)
4 cups julienned watermelon
3 cups julienned cantaloup
2 to 3 green onions, dark green tips discarded
Juice from 1 lime
Drizzle of honey (optional)

Directions:

1. Place the julienned jicama, watermelon and cantaloup in a bowl; toss lightly with lime juice.

2. Slice the white and light green parts of the onions and add them to the jicama mixture in bowl.

3. If desired, drizzle with honey and serve immediately.

Note: This salad is great as a fruit course or a snack.

Text and Photographs ©2013 Nancy DeLucia Real