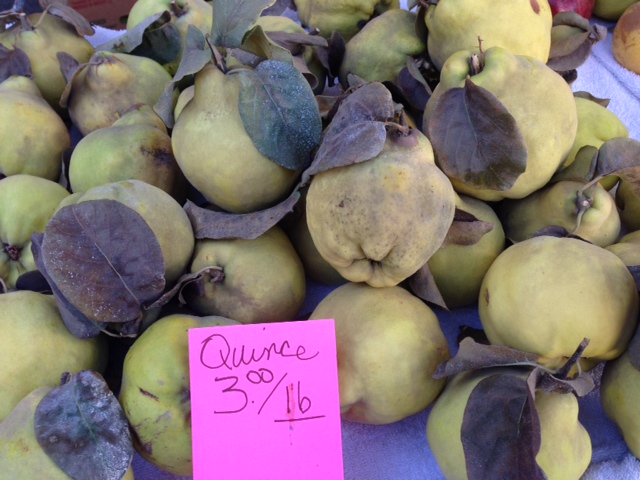
All Posts By: NANCY DeLUCIA REAL

Home » Articles posted by NANCY DeLUCIA REAL (Page 42)

Chard & Tomatoes

In Sides, Vegetables On September 20, 2013 0 Comments

I still have lots of chard sprouting like weeds in my vegetable garden.

Chard.MediumFormat

Here’s a simple, but fine-tasting recipe with limited ingredients. This means that if you’ve got to buy chard to make this dish, your cost won’t break the bank. I know this is a good thing, since many of us are aiming for bargains at those end-of-summer sales.

Enjoy Chard and Tomatoes as a healthy and delicious side to grilled meats, poultry or seafood dishes.

Prep time: 20 minutes
Serves: 4 (as a side dish)

Ingredients:
2 bunches (about 8 cups) coarsely chopped fresh chard
3 to 4 tablespoons extra virgin olive oil (or more, depending on your taste)
Salt and ground black pepper, to taste
2 yellow or red tomatoes, deseeded & cut into 1/4-inch pieces

1. Rinse, drain and spin dry the chopped chard in cold water about 3 to 4 times (this will remove dirt particles). Set chard aside.

2. Meanwhile, bring a 5 to 6-quart sauce pot filled with water to a boil.

3. When water is boiling, add the chard.

4. Cook chard about 2 to 4 minutes or until it is wilted and tender, but not overcooked.

5. When chard is cooked, drain it in a colander and let it cool slightly, for about 5 minutes.

6. Drain the chard very well and transfer it to a serving bowl.

7. Stir the oil, salt and pepper into the chard. Add tomato pieces and stir once more.

8. Taste, adjust seasonings and serve immediately.

Text and Photograph ©2013 Nancy DeLucia Real

My Bittersweet Canning Education in Italy

In Nancy's Articles On September 13, 2013 6 Comments

As my summer canning classes wind down, I’m transported to my upbringing in Italy. As I reminisce on how I came to master these wonderful canning techniques, I simultaneously feel joy and pain.

Between the ages of 9 and 13, I lived in the province of Avellino which is in the Campania region of Southern Italy. My family and I were living in my paternal grandparents’ home. At birth, my father decided to name me after his mamma, Annunziata Falco DeLucia.

Yes, I am Annunziata DeLucia, aka Nancy DeLucia Real (“Real” is my married name). Annunziata means “Announced” or “Annunciation” – my name commemorates the Annunciation of Mary. Here’s my favorite depiction of the Annunciation by Fra Angelico. In this scene, the angel Gabriel announces to Mary that she will conceive by the Holy Spirit and become the mother of Jesus. In almost every depiction of the Annunciation, Mary always looks either scared or annoyed with the enormous task she’s been given.

annunciation

That’s exactly how I felt in the summer of 1970 – annoyed at what a terrible summer I was about to have. During the school year I had really looked forward to hanging out with my friends in our paese or village.

Canning.StoryPiazza

However, after giving me just a few days of summer freedom, my Nonna escorted me to greet the workers of her 100+ hectares of land. They laid out truckloads of peaches and plums all over the courtyard. I was told that we had to convert all those kilos of fruit to preserves.

My maestra or master was Nonna Nunzia (that’s her nickname and mine, of course). She told me we had to fill a few hundred jars with our homemade delicacies. Dio mio (this means, “Oh my God!”)! Would I ever be free to see my amici or friends in the village piazza?

I was so good all year, reciting all that text about Alexander the Great, Emperor Hadrian and the majesty of the Roman Empire by memory, each day in front of a whole class. Why couldn’t I join in the fun and go with my friends to Paestum – a beautiful beach at the Tyrrhenian Sea?

Image.TyrrhenianSea

My friends and their families were all headed there, except for me. I could just imagine everyone going to visit the 6th-century B.C. Greco-Roman temples dedicated to Poseidon, Hera and Athena, also located at Paestum.

Image.PaestumTemples

But not me. My reward for being the best student of the year was to get stuck in a canning project with Nonna. She’d make sure I was smorta or dead tired for the next month. And then, with the excuse that “it’s too dark for you to go out,” I knew I was in a jail kitchen!

Early in July, we worked on fruit. My daylight hours were spent washing, cutting and pitting plums and peaches. We cooked the fruit, canned and labeled it. For the next year, our family members would be spoiled with delicious homemade jams and preserves.

In August, Nonna’s farmers brought us the tomato bushels. I could see all the pomodori or tomatoes, but no hints of freedom, cinema or ragazzi – these are sexually-charged Italian boys with Dante-like poetic skills. With their cool looks and smooth, romantic tactics, all of our defenses went through a rapid meltdown!

Image.ItalianBoys

Back to the tomatoes for now. They were grown from natural seed (hailing from the previous years’ crops) – and they were not “GMO’s”. I boiled the tomatoes for a few minutes and thought this was the last step in our canning project. In reality, sorting through those tomatoes would take days.

Eventually, our truly “vine-ripened” tomatoes were transformed into food ingredients for winter cooking. Our finished masterpiece took the form of whole peeled tomatoes and tomato puree – all canned and ready for the pantry shelves.

The orto or vegetable garden produced a bounty of eggplant, zucchini, onions, garlic and bell peppers. These ingredients went into our stufato di verdure or ratatouille for canning.

TomatoesfromGardenWatermark-300x243

I finished all my work by mid-September. And then, my freedom finally arrived – school! The class benches we sat on seemed to be remnants from the Middle Ages – not deeper than 8 inches. This was not great for us annoying and complaining adolescents! As for me, the discomfort was heavenly compared to all that summer work in the courtyard!

Although it has been a “no pain, no gain” education for me, here I am, Maestra Nunzia, happily sharing my passion for canning techniques, international gastronomy and art history with all my sous-chefs!
Image.Nancy'sCannStoryGroup

Nonna Annunziata, if you can hear me, mille grazie per tutto cio che mi abbia insegnato! This translates to, “A thousand thanks for all that you taught me.”

Nunzia:)))

Text and Two Photographs (canned preserves & Nancy in kitchen with
sous-chefs) ©2013 Nancy DeLucia Real

Rice-Spice Cookies (Gluten-free)

In Cookies, Candies & Sweets On September 6, 2013 4 Comments

A few weeks ago, one of our friends on Facebook/The Kitchen Buzzz asked us for a gluten-free recipe. Here it is – rice cookies with a hint of cinnamon, allspice and a drizzle of chocolate. Please make our Rice-Spice Cookies and let us know how they taste with coffee, tea or cappuccino!

Prep time: 25 minutes (cookies and chocolate drizzle)
Bake time: 12 to 15 minutes

Ingredients:

1-2/3 cup white rice flour (preferably organic)
1/2 teaspoon baking powder
1/8 teaspoon baking soda
1/8 teaspoon salt
1/8 teaspoon ground cinnamon
Dash ground allspice
1/3 cup granulated, unbleached sugar
1/2 teaspoon vanilla extract
1/4 cup light olive oil
1/4 cup raisins (optional)
2/3 cup plus 1 to 2 tablespoons cold water
1/2 cup semi-sweet chocolate chips (for chocolate drizzle)

1. Preheat oven to 350°F.

2. In a 2-quart mixing bowl, combine the flour, baking powder, baking soda, salt, cinnamon, allspice, sugar and vanilla.

3. Using a fork or pastry cutter, mix in the oil and raisins.

4. Add 2/3 cup water and mix again. If mixture is too crumbly, add 1 tablespoon water and mix again. If mixture is still crumbly, add the remaining tablespoon of water; mix until a dough is formed.

5. After dough is formed, pull off a piece of dough to form a one-inch ball. Place ball on a 18X12-inch baking sheet lined with parchment paper. Continue forming dough balls, spacing them one inch apart from each other on baking sheet.

6. Using a fork, flatten the cookie dough tops slightly.

7. Place baking sheet with cookie dough balls on rack positioned in center of oven.

8. Bake cookies 12 to 15 minutes or until undersides are light golden brown.

9. After cookies are done, transfer the baking sheet to a counter; cool the cookies completely.

Note: Due to the consistency of the rice flour, these cookies have a grainy texture.

Make the Chocolate Drizzle:

1. When cookies are cool, set the chocolate chips in a double boiler and melt. When chocolate has melted, set the upper portion of the double boiler on a trivet, away from heat. Cool the chocolate for 2 to 3 minutes.

2. When chocolate is still warm and melted, but cool enough to handle, transfer it to a pastry bag fitted with a narrow tip.

3. Holding the pastry bag with both hands, squeeze it to drizzle the chocolate over cookie tops.

Cool and serve Rice-Spice Cookies with coffee, tea, milk, cappuccino or other favorite drink.

Text and Photographs ©2013 Nancy DeLucia Real

Jicama, Watermelon & Cantaloup Salad

In Fruit and Jams, Fun Foods, Salads On August 30, 2013 4 Comments

The idea for this salad sort of sparked when I noticed how boring the jicama, watermelon and cantaloup looked on my kitchen counter.

I was surprised at how delicious and beautiful it all turned out. On our upcoming Labor Day weekend and after all that grilled meat, enjoy this salad as a refreshing fruit course. Stay safe and enjoy the holiday!

Prep time: 15 to 20 minutes
Serves: 4 to 6

Ingredients:
3 cups peeled and julienned jicama (one 5-inch jicama or less)
4 cups julienned watermelon
3 cups julienned cantaloup
2 to 3 green onions, dark green tips discarded
Juice from 1 lime
Drizzle of honey (optional)

Directions:

1. Place the julienned jicama, watermelon and cantaloup in a bowl; toss lightly with lime juice.

2. Slice the white and light green parts of the onions and add them to the jicama mixture in bowl.

3. If desired, drizzle with honey and serve immediately.

Note: This salad is great as a fruit course or a snack.

Text and Photographs ©2013 Nancy DeLucia Real

Peachy Plum Upside-Down Cake

In Cakes & Cupcakes On August 24, 2013 7 Comments

Summer is the season for peaches and plums. As I taste samples at various fruit stalls of the Santa Monica Farmers Market, I lose control and buy at least 15 to 20 pounds of both fruits. What’ll I do with all that fruit? After making some preserves, I’m thinking of making this peachy plum upside down cake for my next pool party.

Prep time: 20 minutes
Bake time: 35 to 40 minutes
Makes: One 9-inch cake

Ingredients (for preparing & placing fruit at bottom of pan):

2 tablespoons melted butter or vegetable oil (for greasing)
One 9-inch springform pan
One 9-inch parchment paper circle (cut the parchment to fit inside bottom of pan)
Juice of 1 lime
2 medium peaches
2 large plums
1 to 2 tablespoons vegetable oil
1/3 cup granulated sugar (preferably unbleached)
1 extra peach (for garnishing cake)
1 or 2 extra plums (for garnishing cake)

Ingredients (for cake batter to pour over fruit in pan):

2 cups unbleached white flour
2 teaspoons baking powder
1/2 teaspoon salt
2 large eggs
3/4 cup granulated sugar (preferably unbleached)
1 teaspoon vanilla extract
1-1/3 cup milk (whole, 2% milk fat, 1% milkfat or nonfat)

Slice & Prepare the Peaches & Plums:

1. Preheat oven to 350°F.

2. Grease and flour the sides of springform pan.

3. Place parchment paper circle to fit in bottom of pan; set aside.

4. Squeeze lime juice into a 2 or 3-quart bowl and set aside.

5. Meanwhile, peel the peaches, cut them in half and remove pit. Thinly slice the peaches and place them in bowl with lime juice, giving them a light stir (be careful not to break the slices). Set aside.

6. Thinly slice the plums (do not peel them) and add them to the peaches in bowl. Give them a light stir and set aside.

7. Brush the parchment paper in pan with vegetable oil and then sprinkle it with 1/3 cup sugar; set pan aside.

Prepare the Cake Batter:

1. In a 1-quart bowl, stir together the flour, baking powder and salt; set aside.

2. In a stand mixer fitted with a bowl, whisk together the eggs, sugar and vanilla extract (alternately, this step can be done with an electric hand mixer and regular bowl). Stir in the milk and mix well until batter is uniform.

3. Pour the batter over prepared fruit in pan.

4. Set the pan on a rack positioned in center of oven.

5. Bake the cake for 25 minutes.

6. After 25 minutes, test doneness of cake by inserting a sharp, pointed knife in its center. If knife comes out clean, the cake is done.

7. Since each oven heats differently, it may be necessary to bake the cake in additional increments of 5 minutes, testing doneness with knife each time.

8. When cake is done, transfer it (do not remove cake from pan) to a counter to cool.

9. Cool the cake in pan for 30 minutes.

10. After 30 minutes, invert cake onto a serving platter.

11. Remove sides of pan and peel off the parchment paper from cake.

Serve cake, garnished with mint leaf sprigs and additional slices of peaches and plums.

Optional: Garnish each cake slice with our 5-Minute Sweetened Whipped Cream recipe, previously published on this website (in Desserts, Creams & Sauces).

Text and Photograph ©2013 Nancy DeLucia Real