

You don’t have to be from the southern region of Calabria, Italy to enjoy homemade “peperoncini” or hot peppers preserved in olive oil. Italians call these “peperoncini sott’olio” and usually sprinkle them over pasta.
First, when buying them fresh from a farmers’ market, here’s what the peppers look like:
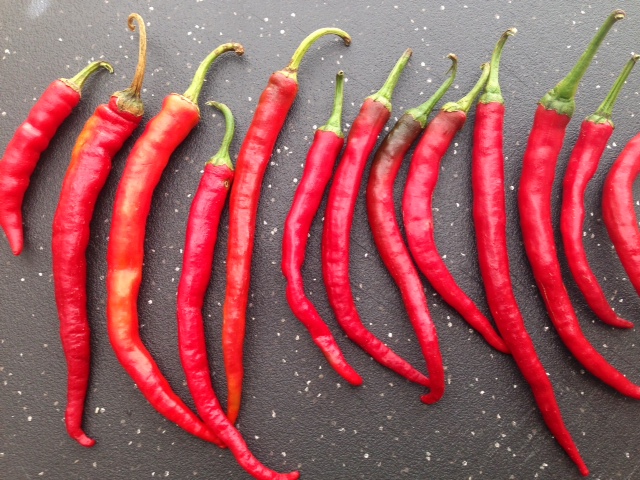
Aren’t they cute?
This recipe for preserving the hot peppers is so simple that you’ll wonder why you haven’t made them before. When setting the condiment dish with Hot Calabrese Peppers on the table, make sure to tell your guests that a tiny amount of the peppers will add lots of “heat” to their pasta dish.
Active prep time: 35 minutes
Inactive prep time: 24 hours (for draining peppers overnight)
Ingredients:
One 8-ounce glass canning jar with lid and cover (washed in warm, soapy water & rinsed)
3 cheesecloths
20 to 22 fresh Calabrese peppers
3/4 to 1 teaspoon salt
1/4 cup to 1/3 cup white wine vinegar (for sprinkling peppers)
1 cup safflower or sunflower oil (you may need to add a little more)
Sterilizing the Jar, Lid & Cover-
1. Place the jar, lid and cover, wrapped in a cheesecloth, in a 4 or 5-quart sauce pot.
2. Fill the sauce pot with water to 3 inches below rim (the water should be 2 inches above cheesecloth containing jar, lid and cover).
3. Bring the water with jar, lid and cover to a boil. Boil for 15 minutes.
4. After 15 minutes, using canning tongs, carefully remove jar, lid and cover from water. Place them on a triple layer of paper towels on a board on kitchen counter; set aside to cool.
Preparing the Peppers:
1. Meanwhile, wash the peppers and dry each one with paper towels (remove all traces of moisture around the peppers).
2. Line a 12 to 14-inch round colander with a clean cheesecloth – make sure that the cheesecloth is centered over the colander. Let the cloth hang over sides of colander; set aside.
3. To prevent the pepper seeds from burning your fingers, wear sanitary disposable gloves. Using shears, pick up the first pepper by its green stem.
4. Holding the pepper above the cloth-lined colander and beginning at the pointed end of the pepper, cut it into 1/2-inch circles with the shears.
Note: If seeds look black, discard the pepper.
5. Let the pepper circles fall into the cloth-lined colander.
6. Discard the green stem and continue cutting the remaining peppers until you have formed one layer in the cheesecloth in colander.
7. After you have formed one layer of pepper circles, sprinkle them lightly with salt.
8. Follow with a sprinkling of white wine vinegar (about 2 to 4 tablespoons). The first layer of pepper circles will look like this:

9. Place the second cheesecloth over the first prepared layer of peppers.
10. Repeat the cutting procedure to form a second layer of pepper circles over cheesecloth.
11. Repeat the addition of salt and vinegar and cover the pepper circles with a third cheesecloth.
12. Place a sauce pot filled with cold water (this will act as a weight) over the pepper circles in colander and set aside on a counter for 24 hours.
Draining & Canning the Peppers-
1. After 24 hours, carefully remove the pepper circles from cheesecloths and transfer them to the sterilized jar.
2. Using a small spoon, gently but lightly press the pepper circles in the jar (this procedure will remove air bubbles).
3. When the jar is filled to 3/4-inch below the rim, carefully and slowly pour the oil over the pepper circles.
4. Fill the jar until the oil covers the pepper circles by 1/2-inch. This means there should be 1/2-inch oil above the peppers.
5. Place lid over jar, followed by the cover. Close tightly.
6. Store the jar with peppers in refrigerator for one month (this will bring forth a nice fusion of all flavors).
7. After opening the jar of Calabrese Pepper Preserves for the first time, store it in the refrigerator. From this point on, the peppers will last 3 to 4 weeks.
Text and Photograph ©2013 Nancy DeLucia Real


 Nancy DeLucia Real is an art historian and chef. She has led culinary courses at the Italian Cultural Institute, The Getty Center and The Getty Villa and is a former member of the Culinary Historians of Southern California. Nancy's gastronomy training took place in the heart of Italy under the tutelage of her grandmother. She has taught international cuisine at Williams Sonoma and Sur la Table Stores. Nancy's art history & culinary courses are ongoing at various institutions. She also teaches private cooking classes.

